Blog

  • APA vs MLA vs Chicago: Which Citation Style Should You Use?

    APA vs MLA vs Chicago: Which Citation Style Should You Use?

    Choosing the correct citation style is an important part of academic writing. Whether you are preparing a university essay, a research paper, a literature review, or a dissertation, you need to acknowledge your sources in a consistent and accurate way. Three of the most widely used academic citation styles are APA, MLA, and Chicago.

    Although all three styles help writers credit sources and avoid plagiarism, they differ in how citations appear in the text, how source information is organized, and which academic disciplines commonly use them.

    In this guide to APA vs MLA vs Chicago, you will learn the main differences between these styles, see practical citation examples, and discover how to choose the right format for your assignment.

    What Are APA, MLA, and Chicago Citation Styles?

    APA, MLA, and Chicago are established systems for documenting sources in academic and professional writing. Each style provides rules for citing books, journal articles, websites, reports, and other materials.

    The main purpose of a citation style is to help readers identify the original sources behind your ideas, evidence, quotations, and research findings.

    Here is what each abbreviation means:

    • APA: American Psychological Association. It is commonly used in psychology, education, business, and other social sciences.
    • MLA: Modern Language Association. It is widely used in literature, language studies, and other humanities disciplines.
    • Chicago: The Chicago Manual of Style. It is commonly used in history, publishing, and several humanities and social science fields.

    These are general conventions rather than universal rules. Your instructor, university, department, or target journal may require a specific style regardless of your subject.

    APA vs MLA vs Chicago: Quick Comparison

    The easiest way to understand the differences is to compare the main features of each style.

    FeatureAPAMLAChicago
    Full nameAmerican Psychological AssociationModern Language AssociationThe Chicago Manual of Style
    Common fieldsPsychology, education, social sciencesLiterature, languages, humanitiesHistory, arts, humanities
    In-text citationAuthor and yearAuthor and page number, when availableFootnotes or author-date citations
    End-of-paper source listReferencesWorks CitedBibliography or References, depending on system
    Main emphasisPublication date and research currencyAuthor and location of cited passageFlexible documentation, including detailed notes
    Common editionAPA 7th editionMLA 9th editionChicago 18th edition

    The most important difference is how each style connects information in your paper to the full source details at the end. APA emphasizes the publication date, MLA commonly identifies the page where material appears, and Chicago offers two distinct citation systems.

    1. What Is APA Style?

    APA style is a citation and formatting system developed by the American Psychological Association. It is particularly common in psychology, education, sociology, nursing, and other fields where the timing of research can be important.

    APA generally uses author-date citations in the body of a paper. The author’s surname and the publication year appear together, allowing readers to identify the source and understand when the research was published.

    APA in-text citation example

    Suppose you are citing a fictional book written by Jane Smith in 2023.

    A parenthetical citation would look like this:

    Regular feedback can support student learning (Smith, 2023).

    A narrative citation would look like this:

    Smith (2023) explains that regular feedback can support student learning.

    For a direct quotation, APA generally requires a page number when the source has pages:

    “Feedback supports continued improvement” (Smith, 2023, p. 42).

    These examples are illustrative and do not refer to a real publication.

    How does an APA reference list work?

    APA papers typically end with a page titled References. Entries are arranged alphabetically by the first author’s surname and include the information readers need to locate each source.

    A simplified example for the fictional book is:

    Smith, J. (2023). Learning through feedback. Academic Press.

    Actual reference entries may require additional details depending on the source type, including a DOI, URL, volume number, or page range.

    When should you use APA?

    APA is generally appropriate when you are writing:

    • Psychology research papers
    • Education assignments
    • Social science reports
    • Nursing and health-related coursework where APA is required
    • Research papers that emphasize recent findings and publication dates

    If your assignment instructions specify APA 7th edition, follow that edition’s rules rather than relying on older citation examples.

    2. What Is MLA Style?

    MLA style was developed by the Modern Language Association and is widely used in English studies, literature, language learning, and other humanities subjects.

    Unlike APA, MLA in-text citations usually emphasize the author’s surname and the page number where the cited material appears. This approach is useful when writers analyze particular passages, scenes, or sections of a text.

    MLA in-text citation example

    Using the same fictional author and book, an MLA parenthetical citation might look like this:

    Regular feedback can support student learning (Smith 42).

    Notice that the publication year is not normally included in this standard in-text format. MLA also generally omits the comma between the author’s surname and the page number.

    If you mention the author in your sentence, you can write:

    Smith argues that regular feedback can support student learning (42).

    When a source has no page numbers, do not invent them. Follow MLA guidance for the source type and cite the available identifying information where appropriate.

    How does an MLA Works Cited page work?

    MLA papers normally include a final page titled Works Cited. It lists the sources cited in the paper, arranged alphabetically by the first element of each entry.

    A simplified entry for the fictional book would be:

    Smith, Jane. Learning through Feedback. Academic Press, 2023.

    MLA uses a structured approach to source details, often described through its core elements and the containers in which works appear. This helps writers cite different materials, including books, journal articles, websites, films, and other media.

    When should you use MLA?

    MLA is commonly used for:

    • English literature essays
    • Literary analysis
    • Language and cultural studies
    • Humanities assignments
    • Essays that examine particular passages from books, plays, or poems

    If your instructor asks you to analyze a novel or poem using MLA, pay close attention to page references and the formatting of the Works Cited page.

    3. What Is Chicago Style?

    Chicago style is based on The Chicago Manual of Style. It is widely associated with history, art history, publishing, and other humanities disciplines. One of its defining features is that it provides two major citation systems.

    These systems are called Notes and Bibliography and Author-Date. They serve similar purposes but organize citations differently.

    Chicago Notes and Bibliography

    The Notes and Bibliography system uses numbered references in the text that correspond to footnotes or endnotes. A bibliography is commonly included at the end of the paper.

    For example, a sentence might include a superscript note number:

    Regular feedback can support student learning.¹

    The corresponding footnote could provide the source details:

    1. Jane Smith, Learning through Feedback (Academic Press, 2023), 42.

    This is a simplified illustrative example. Chicago formatting and punctuation depend on the source type and whether the source is cited for the first time or again later.

    Footnotes allow writers to provide source information without placing a full parenthetical citation in the sentence. They can also accommodate certain explanatory notes when appropriate.

    Chicago Author-Date

    Chicago also offers an Author-Date system, which uses parenthetical citations similar to APA.

    An example is:

    Regular feedback can support student learning (Smith 2023, 42).

    The corresponding reference list provides the complete publication information.

    When should you use Chicago?

    Chicago is often appropriate for:

    • History research papers
    • Art history assignments
    • Humanities research
    • Book-length scholarly writing
    • Projects that benefit from detailed footnotes or endnotes

    Check whether your assignment requires Notes and Bibliography or Author-Date. Choosing Chicago alone may not be enough because the two systems use different citation formats.

    4. The Main Differences Between APA, MLA, and Chicago

    Understanding the differences between these styles makes it easier to apply the correct rules consistently.

    In-text citations

    APA generally uses the author’s surname and publication year, such as (Smith, 2023). This makes the publication date immediately visible.

    MLA commonly uses the author’s surname and page number, such as (Smith 42). This helps readers locate a particular passage in a text.

    Chicago Notes and Bibliography uses superscript numbers linked to footnotes or endnotes. Chicago Author-Date instead uses parenthetical author-date citations, often including a page number for a specific passage.

    Source lists at the end

    APA uses a References page. MLA uses a Works Cited page. Chicago may use a Bibliography in Notes and Bibliography papers or a References list in Author-Date papers.

    These headings are not interchangeable in every situation. Use the heading and source-list format required by your selected style.

    Publication dates

    Publication dates are particularly prominent in APA citations. MLA usually emphasizes the author and cited location in its basic in-text format. Chicago’s approach depends on the system being used: Notes and Bibliography places source details in notes, while Author-Date makes the year visible in the text.

    Footnotes and endnotes

    Footnotes are central to Chicago’s Notes and Bibliography system. APA and MLA may use notes for limited supplementary information, but their standard source documentation does not generally rely on footnotes in the same way.

    Formatting requirements

    Citation style also affects the presentation of the paper, including title pages, headings, margins, page numbers, quotations, and source-list formatting.

    Do not assume that learning the in-text citation format is enough. Review the full requirements for the edition and assignment you are following.

    5. Which Citation Style Should You Use?

    The best citation style is usually the one required by your instructor, department, university, or publisher. If no style is specified, your academic discipline can help you decide.

    Use this practical guide:

    Choose APA if:

    • You are studying psychology, education, or a social science.
    • Your assignment discusses recent studies or research findings.
    • Your instructor requires author-date citations.

    Choose MLA if:

    • You are writing a literature or language essay.
    • You need to refer frequently to specific pages in a text.
    • Your course uses MLA documentation conventions.

    Choose Chicago if:

    • You are writing a history or humanities paper.
    • You need a notes-based system for documenting sources.
    • Your instructor or publication specifically requests Chicago style.

    If you are uncertain, ask your instructor before formatting the entire paper. Changing a long research paper from one style to another can take considerable time.

    6. Common Citation Mistakes Students Should Avoid

    Even well-researched papers can lose marks when citations are incomplete or inconsistent. Avoid these common mistakes.

    Mixing different citation styles

    Do not use APA in-text citations with an MLA Works Cited page unless an assignment explicitly calls for a special format. Choose one required style and apply it consistently.

    Forgetting to cite paraphrased ideas

    A citation is not necessary only when you copy a source word for word. You must also acknowledge ideas, findings, arguments, and information taken from another source, even when you express them in your own words.

    Leaving out sources from the final list

    Check that every source requiring documentation is represented correctly in your source list. Also make sure the entries correspond to citations in the paper, following the rules of your chosen style.

    Relying entirely on citation generators

    Citation generators can save time, but they may misidentify authors, omit publication details, or format unusual sources incorrectly. Review each generated citation against the relevant style guide.

    Using outdated formatting instructions

    Citation manuals are revised periodically. APA 7th edition, MLA 9th edition, and Chicago 18th edition are important reference points, but your instructor may specify a different edition or provide institution-specific guidance.

    7. How to Cite Sources More Accurately

    You can make academic referencing easier by building a simple citation workflow.

    1. Record source details while researching. Save the author’s name, title, publication date, publisher, page range, DOI, or URL as applicable.
    2. Identify the required style early. Confirm the citation style and edition before writing the final draft.
    3. Cite sources as you write. Do not wait until the last minute to reconstruct where each idea came from.
    4. Keep your in-text citations and source list consistent. Follow the rules for the particular style and source type.
    5. Check the final paper. Review punctuation, capitalization, italics, page numbers, author names, and missing information.

    Reference-management tools can help organize sources, but they should support your judgment rather than replace it. When you are unsure how to cite a book chapter, website, report, or other source, consult an authoritative style guide or your university library.

    Frequently Asked Questions

    Is APA better than MLA?

    Neither style is universally better. APA is commonly used in psychology and social sciences, while MLA is widely used in literature and other humanities fields. The correct choice depends on your subject and assignment requirements.

    What is the easiest citation style to learn?

    The answer depends on the type of writing you do. Some students find MLA’s basic author-page citations straightforward, while others prefer APA’s author-date format. Chicago Notes and Bibliography may require more attention to footnotes, but it can be useful for detailed historical research.

    Can I use Chicago style instead of APA?

    Only if your instructor, department, or publisher permits it. If APA is a stated requirement, switching to Chicago may result in incorrect formatting even if your source information is accurate.

    Do APA, MLA, and Chicago all help prevent plagiarism?

    Yes. All three styles provide systems for acknowledging sources. However, following a citation style does not automatically prevent plagiarism: you must still cite borrowed ideas, distinguish quotations from your own writing, and represent sources accurately.

    What is the difference between a bibliography and a Works Cited page?

    A Works Cited page lists sources cited in an MLA paper. A Chicago bibliography may include works cited and, depending on the assignment’s requirements, other works consulted. APA generally uses a References list containing works cited in the paper.

    Conclusion

    Understanding APA vs MLA vs Chicago helps you choose the right citation style and present your academic work professionally. APA is commonly associated with psychology and social sciences, MLA with literature and humanities, and Chicago with history and other fields that benefit from detailed notes or author-date documentation.

    However, subject conventions are only a starting point. Always check your assignment instructions, use the correct edition, and apply the selected style consistently. Accurate citations help readers trace your evidence, strengthen the credibility of your arguments, and demonstrate responsible academic research.

    Although all three styles help writers credit sources and avoid plagiarism, they differ in how citations appear in the text, how source information is organized, and which academic disciplines commonly use them.

    In this guide to APA vs MLA vs Chicago, you will learn the main differences between these styles, see practical citation examples, and discover how to choose the right format for your assignment.

    What Are APA, MLA, and Chicago Citation Styles?

    APA, MLA, and Chicago are established systems for documenting sources in academic and professional writing. Each style provides rules for citing books, journal articles, websites, reports, and other materials.

    The main purpose of a citation style is to help readers identify the original sources behind your ideas, evidence, quotations, and research findings.

    Here is what each abbreviation means:

    • APA: American Psychological Association. It is commonly used in psychology, education, business, and other social sciences.
    • MLA: Modern Language Association. It is widely used in literature, language studies, and other humanities disciplines.
    • Chicago: The Chicago Manual of Style. It is commonly used in history, publishing, and several humanities and social science fields.

    These are general conventions rather than universal rules. Your instructor, university, department, or target journal may require a specific style regardless of your subject.

    APA vs MLA vs Chicago: Quick Comparison

    The easiest way to understand the differences is to compare the main features of each style.

    FeatureAPAMLAChicago
    Full nameAmerican Psychological AssociationModern Language AssociationThe Chicago Manual of Style
    Common fieldsPsychology, education, social sciencesLiterature, languages, humanitiesHistory, arts, humanities
    In-text citationAuthor and yearAuthor and page number, when availableFootnotes or author-date citations
    End-of-paper source listReferencesWorks CitedBibliography or References, depending on system
    Main emphasisPublication date and research currencyAuthor and location of cited passageFlexible documentation, including detailed notes
    Common editionAPA 7th editionMLA 9th editionChicago 18th edition

    The most important difference is how each style connects information in your paper to the full source details at the end. APA emphasizes the publication date, MLA commonly identifies the page where material appears, and Chicago offers two distinct citation systems.

    1. What Is APA Style?

    APA style is a citation and formatting system developed by the American Psychological Association. It is particularly common in psychology, education, sociology, nursing, and other fields where the timing of research can be important.

    APA generally uses author-date citations in the body of a paper. The author’s surname and the publication year appear together, allowing readers to identify the source and understand when the research was published.

    APA in-text citation example

    Suppose you are citing a fictional book written by Jane Smith in 2023.

    A parenthetical citation would look like this:

    Regular feedback can support student learning (Smith, 2023).

    A narrative citation would look like this:

    Smith (2023) explains that regular feedback can support student learning.

    For a direct quotation, APA generally requires a page number when the source has pages:

    “Feedback supports continued improvement” (Smith, 2023, p. 42).

    These examples are illustrative and do not refer to a real publication.

    How does an APA reference list work?

    APA papers typically end with a page titled References. Entries are arranged alphabetically by the first author’s surname and include the information readers need to locate each source.

    A simplified example for the fictional book is:

    Smith, J. (2023). Learning through feedback. Academic Press.

    Actual reference entries may require additional details depending on the source type, including a DOI, URL, volume number, or page range.

    When should you use APA?

    APA is generally appropriate when you are writing:

    • Psychology research papers
    • Education assignments
    • Social science reports
    • Nursing and health-related coursework where APA is required
    • Research papers that emphasize recent findings and publication dates

    If your assignment instructions specify APA 7th edition, follow that edition’s rules rather than relying on older citation examples.

    2. What Is MLA Style?

    MLA style was developed by the Modern Language Association and is widely used in English studies, literature, language learning, and other humanities subjects.

    Unlike APA, MLA in-text citations usually emphasize the author’s surname and the page number where the cited material appears. This approach is useful when writers analyze particular passages, scenes, or sections of a text.

    MLA in-text citation example

    Using the same fictional author and book, an MLA parenthetical citation might look like this:

    Regular feedback can support student learning (Smith 42).

    Notice that the publication year is not normally included in this standard in-text format. MLA also generally omits the comma between the author’s surname and the page number.

    If you mention the author in your sentence, you can write:

    Smith argues that regular feedback can support student learning (42).

    When a source has no page numbers, do not invent them. Follow MLA guidance for the source type and cite the available identifying information where appropriate.

    How does an MLA Works Cited page work?

    MLA papers normally include a final page titled Works Cited. It lists the sources cited in the paper, arranged alphabetically by the first element of each entry.

    A simplified entry for the fictional book would be:

    Smith, Jane. Learning through Feedback. Academic Press, 2023.

    MLA uses a structured approach to source details, often described through its core elements and the containers in which works appear. This helps writers cite different materials, including books, journal articles, websites, films, and other media.

    When should you use MLA?

    MLA is commonly used for:

    • English literature essays
    • Literary analysis
    • Language and cultural studies
    • Humanities assignments
    • Essays that examine particular passages from books, plays, or poems

    If your instructor asks you to analyze a novel or poem using MLA, pay close attention to page references and the formatting of the Works Cited page.

    3. What Is Chicago Style?

    Chicago style is based on The Chicago Manual of Style. It is widely associated with history, art history, publishing, and other humanities disciplines. One of its defining features is that it provides two major citation systems.

    These systems are called Notes and Bibliography and Author-Date. They serve similar purposes but organize citations differently.

    Chicago Notes and Bibliography

    The Notes and Bibliography system uses numbered references in the text that correspond to footnotes or endnotes. A bibliography is commonly included at the end of the paper.

    For example, a sentence might include a superscript note number:

    Regular feedback can support student learning.¹

    The corresponding footnote could provide the source details:

    1. Jane Smith, Learning through Feedback (Academic Press, 2023), 42.

    This is a simplified illustrative example. Chicago formatting and punctuation depend on the source type and whether the source is cited for the first time or again later.

    Footnotes allow writers to provide source information without placing a full parenthetical citation in the sentence. They can also accommodate certain explanatory notes when appropriate.

    Chicago Author-Date

    Chicago also offers an Author-Date system, which uses parenthetical citations similar to APA.

    An example is:

    Regular feedback can support student learning (Smith 2023, 42).

    The corresponding reference list provides the complete publication information.

    When should you use Chicago?

    Chicago is often appropriate for:

    • History research papers
    • Art history assignments
    • Humanities research
    • Book-length scholarly writing
    • Projects that benefit from detailed footnotes or endnotes

    Check whether your assignment requires Notes and Bibliography or Author-Date. Choosing Chicago alone may not be enough because the two systems use different citation formats.

    4. The Main Differences Between APA, MLA, and Chicago

    Understanding the differences between these styles makes it easier to apply the correct rules consistently.

    In-text citations

    APA generally uses the author’s surname and publication year, such as (Smith, 2023). This makes the publication date immediately visible.

    MLA commonly uses the author’s surname and page number, such as (Smith 42). This helps readers locate a particular passage in a text.

    Chicago Notes and Bibliography uses superscript numbers linked to footnotes or endnotes. Chicago Author-Date instead uses parenthetical author-date citations, often including a page number for a specific passage.

    Source lists at the end

    APA uses a References page. MLA uses a Works Cited page. Chicago may use a Bibliography in Notes and Bibliography papers or a References list in Author-Date papers.

    These headings are not interchangeable in every situation. Use the heading and source-list format required by your selected style.

    Publication dates

    Publication dates are particularly prominent in APA citations. MLA usually emphasizes the author and cited location in its basic in-text format. Chicago’s approach depends on the system being used: Notes and Bibliography places source details in notes, while Author-Date makes the year visible in the text.

    Footnotes and endnotes

    Footnotes are central to Chicago’s Notes and Bibliography system. APA and MLA may use notes for limited supplementary information, but their standard source documentation does not generally rely on footnotes in the same way.

    Formatting requirements

    Citation style also affects the presentation of the paper, including title pages, headings, margins, page numbers, quotations, and source-list formatting.

    Do not assume that learning the in-text citation format is enough. Review the full requirements for the edition and assignment you are following.

    5. Which Citation Style Should You Use?

    The best citation style is usually the one required by your instructor, department, university, or publisher. If no style is specified, your academic discipline can help you decide.

    Use this practical guide:

    Choose APA if:

    • You are studying psychology, education, or a social science.
    • Your assignment discusses recent studies or research findings.
    • Your instructor requires author-date citations.

    Choose MLA if:

    • You are writing a literature or language essay.
    • You need to refer frequently to specific pages in a text.
    • Your course uses MLA documentation conventions.

    Choose Chicago if:

    • You are writing a history or humanities paper.
    • You need a notes-based system for documenting sources.
    • Your instructor or publication specifically requests Chicago style.

    If you are uncertain, ask your instructor before formatting the entire paper. Changing a long research paper from one style to another can take considerable time.

    6. Common Citation Mistakes Students Should Avoid

    Even well-researched papers can lose marks when citations are incomplete or inconsistent. Avoid these common mistakes.

    Mixing different citation styles

    Do not use APA in-text citations with an MLA Works Cited page unless an assignment explicitly calls for a special format. Choose one required style and apply it consistently.

    Forgetting to cite paraphrased ideas

    A citation is not necessary only when you copy a source word for word. You must also acknowledge ideas, findings, arguments, and information taken from another source, even when you express them in your own words.

    Leaving out sources from the final list

    Check that every source requiring documentation is represented correctly in your source list. Also make sure the entries correspond to citations in the paper, following the rules of your chosen style.

    Relying entirely on citation generators

    Citation generators can save time, but they may misidentify authors, omit publication details, or format unusual sources incorrectly. Review each generated citation against the relevant style guide.

    Using outdated formatting instructions

    Citation manuals are revised periodically. APA 7th edition, MLA 9th edition, and Chicago 18th edition are important reference points, but your instructor may specify a different edition or provide institution-specific guidance.

    7. How to Cite Sources More Accurately

    You can make academic referencing easier by building a simple citation workflow.

    1. Record source details while researching. Save the author’s name, title, publication date, publisher, page range, DOI, or URL as applicable.
    2. Identify the required style early. Confirm the citation style and edition before writing the final draft.
    3. Cite sources as you write. Do not wait until the last minute to reconstruct where each idea came from.
    4. Keep your in-text citations and source list consistent. Follow the rules for the particular style and source type.
    5. Check the final paper. Review punctuation, capitalization, italics, page numbers, author names, and missing information.

    Reference-management tools can help organize sources, but they should support your judgment rather than replace it. When you are unsure how to cite a book chapter, website, report, or other source, consult an authoritative style guide or your university library.

    Frequently Asked Questions

    Is APA better than MLA?

    Neither style is universally better. APA is commonly used in psychology and social sciences, while MLA is widely used in literature and other humanities fields. The correct choice depends on your subject and assignment requirements.

    What is the easiest citation style to learn?

    The answer depends on the type of writing you do. Some students find MLA’s basic author-page citations straightforward, while others prefer APA’s author-date format. Chicago Notes and Bibliography may require more attention to footnotes, but it can be useful for detailed historical research.

    Can I use Chicago style instead of APA?

    Only if your instructor, department, or publisher permits it. If APA is a stated requirement, switching to Chicago may result in incorrect formatting even if your source information is accurate.

    Do APA, MLA, and Chicago all help prevent plagiarism?

    Yes. All three styles provide systems for acknowledging sources. However, following a citation style does not automatically prevent plagiarism: you must still cite borrowed ideas, distinguish quotations from your own writing, and represent sources accurately.

    What is the difference between a bibliography and a Works Cited page?

    A Works Cited page lists sources cited in an MLA paper. A Chicago bibliography may include works cited and, depending on the assignment’s requirements, other works consulted. APA generally uses a References list containing works cited in the paper.

    Conclusion

    Understanding APA vs MLA vs Chicago helps you choose the right citation style and present your academic work professionally. APA is commonly associated with psychology and social sciences, MLA with literature and humanities, and Chicago with history and other fields that benefit from detailed notes or author-date documentation.

    However, subject conventions are only a starting point. Always check your assignment instructions, use the correct edition, and apply the selected style consistently. Accurate citations help readers trace your evidence, strengthen the credibility of your arguments, and demonstrate responsible academic research.

  • How to Cite Sources Correctly in Academic Writing

    How to Cite Sources Correctly in Academic Writing

    Academic writing involves more than presenting your own ideas. Students also need to acknowledge the books, journal articles, websites, reports, and other sources that help them develop their arguments. Correct citation gives credit to original authors, allows readers to verify information, and demonstrates that an assignment is based on responsible research.

    However, learning how to cite sources in academic writing can be confusing, especially when different universities and subjects require different citation styles. Students may be unsure when to include an in-text citation, how to paraphrase research, or how to format a reference list.

    The good news is that citation becomes easier when you understand its basic principles. This guide explains when citations are needed, how to use common citation styles, how to format references, and how to avoid mistakes that can weaken your academic work.

    What Is Citation in Academic Writing?

    Citation is the process of acknowledging the sources of information, ideas, evidence, or words used in an academic paper. It helps readers identify where the information originated and locate the original material if they want to explore it further.

    Most academic citation systems have two main components:

    • In-text citations or footnotes: These identify a source at the point where you use its information or ideas.
    • A reference list, Works Cited page, or bibliography: This provides the details readers need to identify and locate the sources.

    The exact format depends on the citation style required for your assignment.

    For example, an author-date system may identify a source using the author’s surname and publication year. A notes-based system may use a footnote or endnote containing publication details.

    Regardless of the format, the purpose remains the same: to acknowledge sources accurately and make your research traceable.

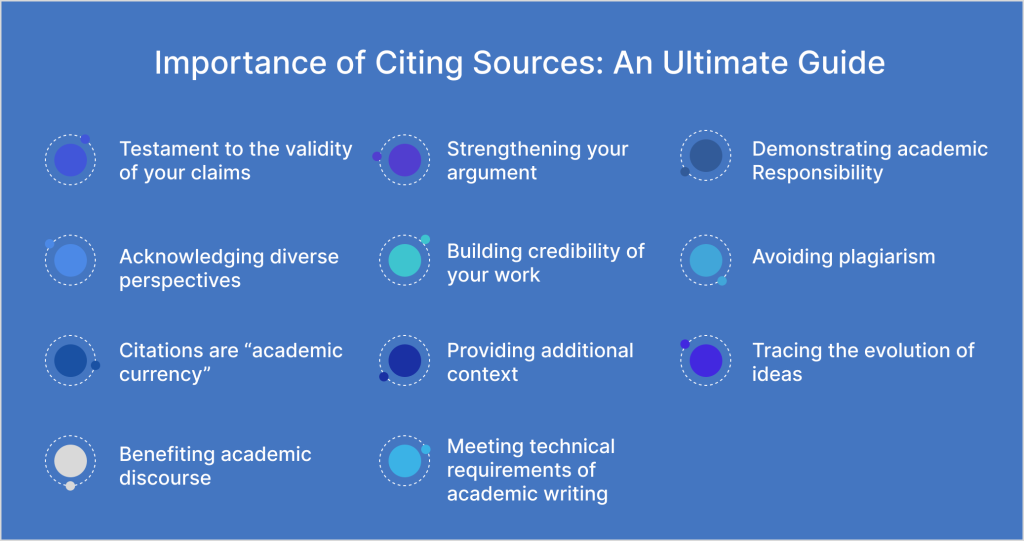
    Why Is Correct Citation Important?

    Correct citation is an essential part of academic integrity. It shows that you recognize the difference between your own contribution and information obtained from other people.

    1. It Helps You Avoid Plagiarism

    Plagiarism occurs when someone presents another person’s words, ideas, or work as their own without appropriate acknowledgment. It can happen intentionally or through misunderstanding citation rules.

    Using quotation marks and citations for direct quotations, and citing sources when paraphrasing or summarizing, helps you acknowledge the original work.

    However, citation alone does not make copied writing acceptable in every situation. Direct quotations should be clearly marked, and paraphrasing should genuinely express the idea in your own words.

    2. It Strengthens Your Arguments

    Reliable sources can support your explanations, provide evidence for claims, and help you compare different perspectives.

    For example, if you argue that a particular teaching strategy improves student learning, citing relevant research allows readers to examine the evidence behind your claim.

    The quality and relevance of your sources matter as much as the presence of citations.

    3. It Helps Readers Verify Information

    A citation gives readers a way to trace a claim to its original source. This is particularly important in research papers, where readers may want to check a statistic, examine a study’s methods, or investigate a different interpretation.

    Complete and accurate references make this process easier.

    4. It Demonstrates Academic Responsibility

    Following the required citation style shows that you understand the conventions of academic research. It also helps distinguish established evidence from your own analysis and conclusions.

    When Should You Cite a Source?

    One of the most important citation skills is knowing when acknowledgment is necessary.

    You should generally cite a source when you use the following:

    Direct quotations. If you reproduce someone else’s exact words, use quotation marks or the appropriate block-quotation format and provide the required citation.

    Paraphrased ideas. If you explain another author’s idea in your own words, you still need to cite the source.

    Summaries of research. If you condense the findings or arguments of a book, article, or report, acknowledge the original work.

    Statistics and specific facts. Cite the source of figures, research results, specialized information, and claims that readers may need to verify.

    Tables, figures, images, and other borrowed material. Follow the relevant style and licensing requirements for attribution and reuse.

    Distinctive theories or interpretations. When discussing a particular scholar’s argument or framework, cite the work where it was presented.

    Common knowledge generally does not require a citation. For example, a basic fact widely known within the intended audience may not need a source. However, what counts as common knowledge depends on the subject, audience, and context. When a claim is specific, disputed, or important to your argument, providing a reliable citation is usually the safer choice.

    Understanding the Main Academic Citation Styles

    Different disciplines use different systems for documenting sources. Always check your instructor’s instructions before choosing a format.

    APA Style

    The American Psychological Association (APA) style is widely used in psychology, education, and other social and behavioral sciences.

    APA uses an author-date system. In-text citations typically include the author’s surname and the year of publication. Direct quotations also require a page number or another suitable location indicator when available.

    Example of a paraphrase:

    Regular feedback can help students identify areas for improvement (Smith, 2023).

    Example of a direct quotation:

    Smith (2023) stated that “specific feedback supports learning” (p. 42).

    These are illustrative examples, not quotations or claims attributed to a verified publication.

    At the end of the paper, include a References list containing the full details of cited sources.

    APA details vary according to the source type, number of authors, and other circumstances. Consult the official style guidance or your institution’s recommended guide for the precise format. <Cite refs={[“turn596526search0″,”turn596526search3”]}/>

    MLA Style

    Modern Language Association (MLA) style is commonly used in literature, language studies, and other humanities disciplines.

    MLA generally uses the author’s surname and a page number for in-text citations when the source has page numbers.

    For example:

    Critical reading involves questioning the evidence behind an argument (Smith 42).

    The corresponding entry appears on the Works Cited page.

    The exact entry depends on whether you are citing a book, journal article, website, or another source. Do not automatically add a publication year to every MLA in-text citation; follow the rules for the particular source and citation style.

    Chicago Style

    Chicago style offers two major documentation systems:

    • Notes and bibliography: Uses footnotes or endnotes, usually alongside a bibliography. It is common in history and some humanities disciplines.
    • Author-date: Uses parenthetical author-date citations and a reference list, often in social sciences and related fields.

    A notes-and-bibliography paper might place a superscript note number after a sentence and provide the source details in a footnote.

    An author-date paper might cite a source in the text using a format such as (Smith 2023, 42).

    Because these systems work differently, confirm which Chicago system your instructor expects. <Cite refs={[“turn596526search2″,”turn596526search6”]}/>

    Quick Comparison of Citation Styles

    FeatureAPAMLAChicago
    Common usePsychology, education, social sciencesLiterature and humanitiesHistory and multiple disciplines
    Typical in-text methodAuthor and yearAuthor and pageNotes or author-date
    End sectionReferencesWorks CitedBibliography or reference list, depending on system
    Page numbersRequired for direct quotations; other uses depend on contextUsed for relevant paginated sourcesUsed where appropriate to the system and source

    These are general patterns, not rules for every assignment. Use the specific edition and instructions required by your institution.

    How to Cite Sources Correctly Step by Step

    Once you know the required style, follow a consistent process throughout your assignment.

    Step 1: Identify the Original Source

    Before citing information, determine where it came from.

    If a webpage discusses a research study, try to locate the original study rather than citing the webpage as if it were the study itself. If you only have access to a secondary source, follow your citation style’s rules for secondary citations instead of implying that you read the original.

    Record the source’s author, title, publication date, publisher or journal, and relevant page numbers or identifiers.

    For online sources, save the DOI or URL when appropriate. A DOI is a persistent identifier commonly used for scholarly publications.

    Step 2: Record Source Details While Researching

    Do not wait until the end of your assignment to collect citation information.

    Keep a record of each source as soon as you decide to use it. For a journal article, useful details may include:

    • Author names
    • Publication year
    • Article title
    • Journal title
    • Volume and issue numbers
    • Page range or article number
    • DOI, if available

    For a book, record the author, title, edition if relevant, publication year, and other details required by your chosen style.

    For a webpage, record the author or organization, page title, date if available, website name where required, and URL.

    The required elements differ between styles and source types, so check the appropriate guide rather than assuming every source follows the same template.

    Step 3: Add In-Text Citations as You Write

    Place citations close to the information they support.

    For example, imagine that you are writing about study habits and have consulted a hypothetical source by Taylor published in 2024.

    An APA-style paraphrase could look like this:

    Students may benefit from reviewing material across multiple study sessions (Taylor, 2024).

    A narrative citation could look like this:

    Taylor (2024) examined how students reviewed course material.

    These examples illustrate the format only. Use real, verified sources in your actual assignment.

    Adding citations while drafting helps you avoid losing track of where a claim came from and reduces the risk of accidentally presenting another person’s idea as your own.

    Step 4: Paraphrase and Summarize Responsibly

    Paraphrasing means expressing a source’s idea in your own words and sentence structure. Summarizing means presenting the main points of a larger source more briefly.

    Changing only a few words while retaining the original sentence structure is not strong paraphrasing.

    To paraphrase effectively:

    1. Read the passage until you understand its meaning.
    2. Look away from the original text.
    3. Explain the idea using your own vocabulary and sentence structure.
    4. Compare your version with the source to check accuracy.
    5. Add the appropriate citation.

    Do not change the author’s meaning to make the evidence fit your argument. If a passage contains a precise definition or wording that is important to your analysis, a properly cited quotation may be more appropriate.

    Step 5: Use Direct Quotations Selectively

    Direct quotations can be useful when the exact wording matters, such as when analyzing a definition, interpreting a passage of literature, or discussing a particular statement.

    However, too many quotations can make an assignment feel like a collection of other people’s words rather than your own argument.

    When quoting, reproduce the wording accurately and follow your citation style’s rules for quotation marks, block quotations, and location information. Introduce the quotation where appropriate and explain how it supports your point.

    Step 6: Build the Reference List

    Once your writing is complete, prepare the final reference section in the format required by your style.

    Check that each entry contains the necessary information and follows the correct order, punctuation, capitalization, and formatting.

    In many author-date systems, sources cited in the text should correspond to entries in the reference list. Notes-based systems may have different conventions, so verify the rules for your chosen style.

    Step 7: Cross-Check Every Citation

    Before submitting your assignment, compare the citations in the text with the final source list.

    Ask yourself:

    • Have I cited every borrowed idea, quotation, statistic, and specific claim that needs acknowledgment?
    • Does every in-text citation lead to the correct source details?
    • Have I included all required information for each source?
    • Are quotations accurate and clearly marked?
    • Have I followed the correct citation style consistently?
    • Are my URLs and DOIs accurate where required?

    A final check can catch missing authors, incorrect dates, incomplete entries, and inconsistent formatting.

    How to Cite Different Types of Sources

    Not all sources are documented in the same way. Here are some common examples of what to look for.

    Books

    For a book, citation details typically include the author, title, publication year, and publisher. Depending on the style and source, an edition or other information may also be needed.

    If you quote from a specific page, provide the required page reference in the text or note.

    Academic Journal Articles

    Journal article references often require the authors, year, article title, journal title, volume, issue, page range or article number, and DOI where available.

    Check the journal’s official record or the article itself to confirm the details.

    Websites and Online Articles

    For online sources, identify the author or organization, the page title, the date if available, and the website or URL information required by your citation style.

    Do not assume that every webpage needs the same fields. If an author or date is missing, consult the rules for handling missing information in your selected style.

    Reports and Institutional Publications

    Reports published by universities, government departments, or organizations may list an institution as the author. Record the title, date, publisher or organization, and identifier or URL as required.

    Check the report’s title page or official publication record rather than relying on an unrelated webpage that mentions it.

    Images, Charts, and Tables

    When using visual material created by someone else, provide the attribution required by the citation style and check whether you have permission or a suitable license to reuse it.

    Citing an image does not automatically grant permission to reproduce it. Follow applicable copyright rules, license conditions, and assignment requirements.

    Common Citation Mistakes to Avoid

    Forgetting to Cite Paraphrased Ideas

    A sentence does not become your original idea simply because you rewrote it. If the underlying idea comes from a source, cite it.

    Mixing Citation Styles

    Combining APA in-text citations with MLA reference formatting can create inconsistencies. Choose the required style and use it throughout the assignment.

    Providing Incomplete References

    Missing publication details, incorrect titles, or broken links make sources difficult to locate. Verify the information against the original publication whenever possible.

    Overusing Direct Quotations

    Quotations can support your argument, but they should not replace your analysis. Use them selectively and explain their relevance.

    Citing Sources You Have Not Checked

    Do not assume that a source supports a claim simply because another author mentions it. When possible, read the original source and confirm that it says what you believe it says.

    Relying on Citation Generators Without Checking Them

    Citation tools can save time, but they may import incorrect dates, capitalize titles incorrectly, omit information, or format a source under the wrong category.

    Treat generated citations as drafts. Compare them with a reliable style guide and correct any errors before submitting your work.

    How to Use Citation Tools Effectively

    Citation management tools can help students collect references, organize research, and insert citations while writing.

    Depending on the tool, you may be able to save PDFs, store bibliographic details, group sources by project, and switch between supported citation styles.

    To use these tools responsibly:

    1. Import the source from a reliable record where possible.
    2. Check the author, title, date, and publication information.
    3. Select the citation style required by your instructor.
    4. Review both the in-text citation and the full reference.
    5. Recheck the final document after editing or changing styles.

    You can also maintain a simple spreadsheet or document with source details if you prefer not to use specialized software.

    The tool you choose matters less than the accuracy of the information you record and the consistency with which you apply the required style.

    Final Thoughts

    Learning how to cite sources correctly in academic writing is an essential skill for producing credible, well-supported assignments. Accurate citations acknowledge original authors, help readers verify evidence, and protect the integrity of your work.

    Start by identifying the citation style required by your instructor. Record source details as you research, cite borrowed ideas where they appear, paraphrase carefully, and prepare a complete reference section using the correct format.

    Finally, check every citation against its original source before submitting your work. Citation generators and reference managers can save time, but they should support your judgment rather than replace it.

    With consistent practice, citation becomes a manageable part of the writing process. More importantly, it helps you build academic arguments that are transparent, responsible, and supported by evidence.

  • How to Read Academic Journal Articles More Efficiently

    How to Read Academic Journal Articles More Efficiently

    Reading academic journal articles is an essential skill for university students, researchers, and anyone working on an academic assignment. However, scholarly articles can be difficult to understand because they often contain specialized terminology, detailed research methods, statistical results, and references to previous studies.

    If you try to read every article from the first sentence to the last with the same level of attention, research can quickly become time-consuming. You may spend an hour on a paper only to discover that it does not answer your research question.

    The solution is to develop a structured reading strategy. Learning how to read academic journal articles more efficiently can help you identify relevant research, understand the authors’ main arguments, evaluate the evidence, and take useful notes without wasting time on unnecessary details.

    This guide explains how to approach scholarly articles step by step, understand their main sections, evaluate research quality, and build a practical routine for academic reading.

    Why Are Academic Journal Articles Difficult to Read?

    Academic articles are written to communicate specialized knowledge, often to readers who already understand the subject. Their structure and language can therefore feel unfamiliar to students who are learning how to conduct academic research.

    Several challenges commonly make these articles difficult.

    Specialized Academic Language

    Research papers often contain technical terms, abbreviations, and discipline-specific expressions. A sentence that appears straightforward to an experienced researcher may be confusing to someone encountering the topic for the first time.

    Instead of looking up every unfamiliar word immediately, identify terms that are essential to understanding the research question, methods, or findings. You can investigate less important vocabulary later.

    Dense Information

    A single paragraph may contain a claim, supporting evidence, references to previous studies, and an explanation of why the information matters.

    Reading without a clear purpose can make it difficult to separate the central argument from supporting details.

    Complex Research Methods and Results

    Some articles include statistical tests, experimental procedures, interview data, or technical diagrams. Understanding these sections may require knowledge of research methods or subject-specific concepts.

    You do not need to master every technical detail in your first reading. Begin by understanding the overall purpose of the study, then examine the methods and results more closely when they are relevant to your task.

    Too Many Articles to Review

    Assignments and research projects may require you to examine several papers. Reading every article in full before deciding whether it is useful can consume valuable study time.

    A staged approach helps you identify promising sources first and prioritize detailed reading.

    Step 1: Set a Clear Purpose Before Reading

    Before opening an article, decide what you need to learn from it.

    Your purpose determines which sections deserve the most attention. A student preparing for a class discussion may need a general understanding of the main argument, while a student writing a research paper may need detailed evidence and limitations.

    Ask yourself:

    • Am I trying to understand the main idea?
    • Do I need evidence for an assignment?
    • Am I comparing the findings of several studies?
    • Do I need to evaluate the research methods?
    • Am I looking for limitations or unanswered questions?

    Write down your main research question before you begin.

    For example, if your assignment investigates the relationship between sleep and academic performance, you should look for studies that examine sleep patterns, learning outcomes, or factors that influence both.

    A clear question makes it easier to recognize relevant information and ignore details that do not contribute to your objective.

    Step 2: Read the Title and Abstract First

    The title and abstract provide an initial overview of the article.

    The title usually identifies the topic, population, variables, or general focus of the research. The abstract summarizes the study’s purpose, approach, main findings, and conclusions, although its format varies between disciplines.

    As you read the abstract, look for answers to four questions:

    1. What is the research about? Identify the main topic or problem.
    2. What did the authors investigate? Look for the research question or objective.
    3. How was the study conducted? Identify the broad method or approach.
    4. What did the authors find? Note the main result or conclusion.

    Then decide whether the article is relevant to your purpose.

    If it addresses a different population, an unrelated question, or a topic outside your assignment, you may not need to read further. If it appears useful, continue to the next stage.

    Remember that an abstract is a screening tool, not a substitute for reading the evidence. Important limitations and methodological details may not be fully explained in the summary.

    Step 3: Preview the Article Before Reading in Detail

    Once an article appears relevant, scan its structure before committing to a close reading.

    Look at the headings and subheadings, the introduction’s final paragraphs, the discussion or conclusion, and any tables or figures. This helps you understand how the paper is organized and where the information you need is likely to appear.

    For many empirical research papers, a useful initial reading order is:

    Title and abstract → introduction → discussion or conclusion → results and figures → methods.

    This order provides an overview before you examine the technical details. It is a flexible strategy rather than a fixed rule; articles in the humanities, theoretical research, and other disciplines may use different structures.

    During this preview, note any repeated terms, unfamiliar concepts, or sections that appear particularly relevant to your question.

    At the end, try to summarize the article’s topic and apparent contribution in one or two sentences. If you cannot do this, reread the abstract or introduction before moving on.

    Step 4: Understand What Each Section Tells You

    Knowing the purpose of each section makes academic reading more efficient because you can focus on the information each part is designed to provide.

    Introduction: What Problem Is Being Investigated?

    The introduction explains the research problem, provides background, and describes why the topic matters. It may also discuss earlier research and identify a gap that the current study aims to address.

    Look for the research question, hypothesis, or central argument. Pay attention to what the authors say is already known and what remains uncertain.

    You do not necessarily need to study every cited publication during your first reading. Instead, identify the previous research that is most relevant to your assignment.

    Literature Review: What Is Already Known?

    Some articles include a separate literature review, while others incorporate it into the introduction.

    This section discusses previous studies, theories, and debates related to the topic. It helps explain how the current article fits into the broader academic discussion.

    Notice where researchers agree, where findings differ, and which unanswered questions the authors identify.

    These details can help you locate additional sources for your own research.

    Methods: How Was the Research Conducted?

    The methods section explains how the researchers collected and analyzed their evidence.

    Depending on the study, it may describe participants, sample selection, experiments, surveys, interviews, measurements, or analytical procedures.

    Ask yourself:

    • Who or what was studied?
    • How was the information collected?
    • What measurements or procedures were used?
    • How were the findings analyzed?
    • Are there any obvious limitations in the study design?

    You may not need every technical detail when reading for a general overview. However, if you plan to use the article as evidence or evaluate its conclusions, the methods are essential.

    Results: What Did the Researchers Find?

    The results section presents the findings produced by the study. These may appear as written explanations, statistical values, tables, charts, interview themes, or other forms of evidence.

    Start by identifying the results that directly answer the research question.

    When examining a table or figure, read its title, labels, units, and notes. Check what is being compared and whether the displayed information supports the authors’ stated interpretation.

    Do not confuse a reported result with an explanation of why it occurred. The results show what the analysis found; explanations and implications are often developed in the discussion.

    Discussion and Conclusion: What Do the Findings Mean?

    The discussion interprets the results and explains how they relate to previous research. It may also discuss practical implications, alternative explanations, limitations, and future research questions.

    The conclusion summarizes the article’s main contribution, although some papers combine the discussion and conclusion into one section.

    Ask whether the authors have answered their research question and whether their conclusions are supported by the evidence they presented.

    Also look for limitations. A study may provide useful evidence without proving that the same result applies to every population or situation.

    Step 5: Evaluate the Quality of the Evidence

    Reading efficiently does not mean accepting every claim at face value. You need to assess whether the research provides suitable evidence for the conclusions.

    Peer review can help improve scholarly work, but it does not guarantee that an article is correct, unbiased, or free from limitations.

    Use the following questions to guide your evaluation.

    Is the research question clear?

    The purpose of the study should be understandable, even if the topic itself is complex.

    Is the method appropriate?

    Consider whether the research design can reasonably answer the question being investigated.

    Is the evidence sufficient?

    Look at the sample, data, measurements, or sources used to support the main claims. The requirements differ across disciplines and research methods.

    Do the conclusions match the results?

    Be cautious when the authors make broad claims based on limited evidence or imply cause and effect when the study only establishes an association.

    Are limitations acknowledged?

    Look for issues such as a small or narrowly selected sample, measurement problems, missing data, or restrictions on how widely the findings can be applied.

    Is the source suitable for your assignment?

    Check the article type, publication details, and journal information. A research paper, editorial, literature review, and opinion piece may serve different purposes.

    These questions help you distinguish between an interesting claim and a conclusion supported by appropriate evidence.

    Step 6: Take Notes That Help You Remember the Article

    Reading an article without recording its main ideas can make it difficult to use the information later, especially when you are working with several sources.

    However, copying entire paragraphs into your notes is inefficient and makes it harder to identify the important points.

    Instead, create a short research summary for each useful article.

    Note categoryWhat to record
    Research questionWhat did the authors investigate?
    Main findingWhat were the most important results?
    MethodHow was the research conducted?
    EvidenceWhat data or arguments support the findings?
    LimitationsWhat should readers interpret cautiously?
    RelevanceHow does the article relate to your assignment?
    Citation detailsAuthors, year, title, journal, and DOI or other identifier if available

    Write summaries in your own words. If you copy an exact quotation, use quotation marks and record the page number or other location information required by your citation style.

    Keep the full citation details from the beginning rather than trying to reconstruct them when the assignment is due.

    This makes it easier to compare articles, prepare a literature review, and cite sources accurately.

    Step 7: Use Active Reading Instead of Highlighting Everything

    Highlighting can draw attention to important passages, but excessive highlighting often makes it difficult to distinguish central ideas from supporting details.

    Active reading requires you to interact with the argument.

    Try the following techniques:

    • Write a question beside a section that you do not understand.
    • Summarize each major section in one or two sentences.
    • Identify the evidence supporting the central claim.
    • Compare the authors’ findings with those of another study.
    • Explain the article’s main argument without looking at the text.
    • Record a possible limitation or alternative interpretation.

    For example, after reading a paper about online learning, close the article and explain its main research question, findings, and limitations from memory.

    Then reopen the paper to check your explanation. This helps you identify misunderstandings before you rely on the article in an assignment.

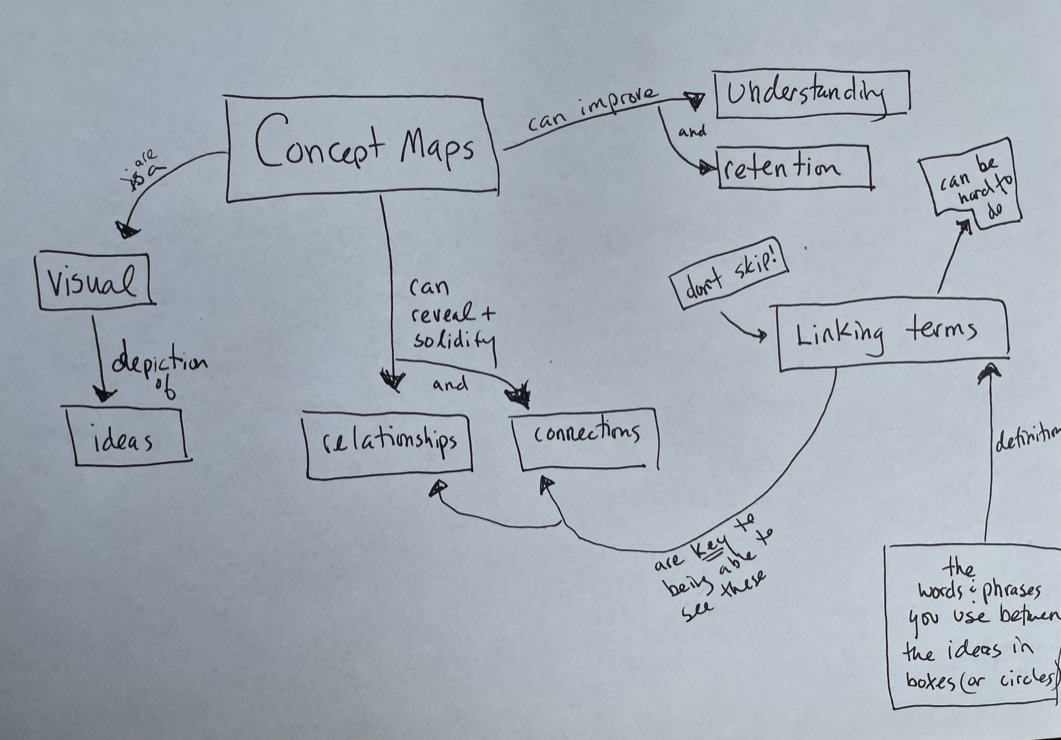
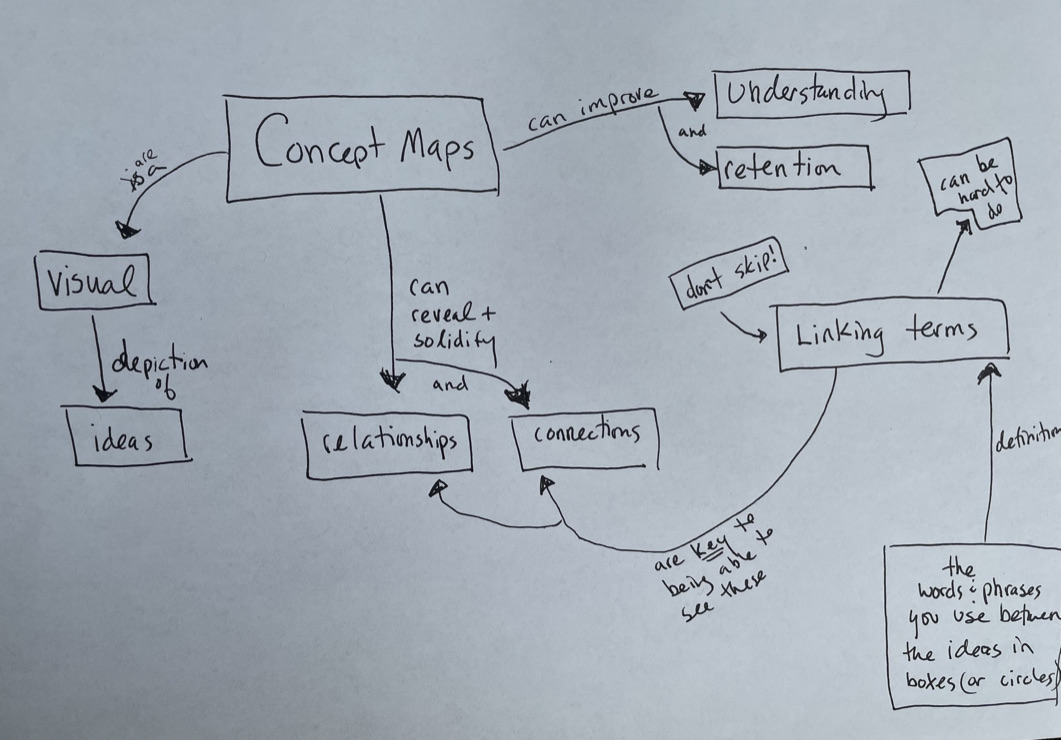
    You can also create a simple concept map when a paper contains many related theories, variables, or processes.

    Step 8: Read Efficiently Without Skipping Important Evidence

    One of the most useful academic reading skills is knowing when to skim, scan, and read closely.

    Skimming helps you understand the general topic and decide whether a source deserves further attention. Read the title, abstract, headings, and conclusion.

    Scanning helps you locate specific information. Search for keywords, relevant terms, names, or concepts related to your research question.

    Close reading is necessary when you need to understand the argument, examine the evidence, or evaluate the methods and limitations.

    For digital articles, use the document’s search function to find relevant terms. However, do not rely on keyword matches alone: a relevant idea may be expressed using different terminology, and a keyword may appear in a context that does not answer your question.

    Avoid treating speed as the only measure of efficiency. If a section is central to your assignment, spend enough time to understand it accurately.

    A Practical 30-Minute Academic Article Reading Routine

    If you need to review a paper efficiently, use this flexible routine as a starting point.

    Minutes 1–4: Identify your purpose

    Write down your research question and what you need from the article.

    Minutes 5–9: Read the title and abstract

    Decide whether the article is relevant and identify its main question and reported findings.

    Minutes 10–14: Preview the structure

    Scan the introduction, headings, discussion or conclusion, and relevant figures.

    Minutes 15–22: Read the most relevant sections closely

    Focus on the evidence, explanations, or methods that directly address your purpose.

    Minutes 23–27: Evaluate the article

    Check the relationship between the research question, methods, findings, and conclusions. Note important limitations.

    Minutes 28–30: Write a short summary

    Record the central finding, why it matters, how reliable or relevant it appears, and how you might use it.

    This schedule is not a rule for every paper. A complex statistical study or an article central to your dissertation may require much longer. The aim is to make your reading purposeful, not to force every paper into a fixed time limit.

    Common Mistakes to Avoid When Reading Academic Articles

    Reading Every Article From Beginning to End Immediately

    Not every source deserves the same amount of attention. Screen articles first, then read the most relevant sources in greater depth.

    Skipping the Methods Section Entirely

    The methods help you understand how the evidence was produced. Ignoring them can lead you to misinterpret the results or overestimate what a study demonstrates.

    Accepting the Abstract as the Complete Story

    An abstract provides an overview but may omit details about the study’s limitations, measurements, and analysis. Check the full article before making important claims based on it.

    Looking Up Every Unfamiliar Word

    Constantly interrupting your reading can make it difficult to follow the overall argument. Prioritize terms that are essential to understanding the research, and return to less important vocabulary later.

    Highlighting Without Summarizing

    A page full of highlighted sentences is not the same as a clear understanding. After reading, summarize the main claim and evidence in your own words.

    Forgetting to Record Citation Information

    If you do not save the article’s bibliographic details, you may waste time searching for them again. Record the information when you decide a source is worth keeping.

    Final Thoughts

    Learning how to read academic journal articles more efficiently involves more than reading faster. It requires a clear purpose, a structured approach, and the ability to distinguish important evidence from less relevant detail.

    Start by identifying your research question, reading the title and abstract, and previewing the article’s structure. Then focus on the sections that answer your question, examine the evidence carefully, and record the findings in your own words.

    Most importantly, match your reading depth to your goal. A source that is only loosely related to your topic may need a brief review, while a paper central to your research deserves careful attention to its methods, results, and limitations.

    With practice, academic reading becomes more manageable. You can make better use of your study time, evaluate sources more critically, and build a stronger foundation for assignments, literature reviews, and independent research.

  • How to Memorize Complex Information Using Memory Techniques

    How to Memorize Complex Information Using Memory Techniques

    Memorizing complex information can be one of the biggest challenges students face. A biology chapter may contain dozens of unfamiliar terms, a history lesson may include important dates and events, and a mathematics course may require you to remember formulas and understand when to apply them. Reading the same material repeatedly can feel productive, but remembering it later is not always easy.

    The solution is not necessarily to study for longer. Instead, you can learn to study more strategically.

    Using effective memory techniques for students can help you organize information, strengthen recall, and remember important concepts for longer. Techniques such as active recall, spaced repetition, chunking, mnemonic devices, and elaboration provide different ways to work with information, depending on what you need to learn.

    This guide explains how these memory techniques work, how to apply them to different subjects, and how to build a practical study routine that helps you prepare for exams without relying entirely on last-minute memorization.

    Why Is Complex Information Difficult to Memorize?

    Before choosing a memory technique, it helps to understand why some information is harder to remember than other information.

    Too Much Information at Once

    When a lesson contains many new terms, facts, or procedures, it can become difficult to organize everything mentally. Trying to memorize an entire chapter in one sitting may leave you overwhelmed and unsure which details matter most.

    Breaking the material into smaller, meaningful sections makes it easier to approach one part at a time.

    Lack of Meaningful Connections

    Information is often harder to remember when it seems unrelated to anything you already know.

    For example, memorizing a list of biological terms may be difficult if you do not understand how those terms relate to a particular process. Connecting new information to familiar concepts, examples, or explanations can make it easier to understand and retrieve.

    Passive Studying

    Reading a textbook or highlighting notes may help you recognize information when you see it again. However, recognition does not necessarily mean you can recall the same information independently.

    Students need opportunities to retrieve information without looking at the answer. This helps them discover what they remember and what still needs attention.

    Long Gaps Between Reviews

    If you study a topic once and do not revisit it, recalling the details later may become difficult. Returning to material across multiple study sessions can support longer-term retention.

    The goal is to review strategically rather than repeatedly studying everything in the same session.

    8 Effective Memory Techniques for Students

    Different memory techniques serve different purposes. You may use one method to learn vocabulary, another to understand a scientific process, and a combination of techniques to prepare for an examination.

    1. Active Recall: Test Yourself Without Looking at Your Notes

    Active recall is the process of retrieving information from memory instead of simply reviewing it.

    It is one of the most useful memory techniques for students because it turns studying into a process of remembering and checking rather than just reading.

    How to use active recall:

    1. Read a short section of your textbook or notes.
    2. Close the material.
    3. Write down or explain everything you can remember.
    4. Compare your response with the original information.
    5. Correct mistakes and test yourself again later.

    For example, after studying the stages of cellular respiration, try explaining each stage without looking at your notes. Check whether you remembered the sequence, purpose, and important details.

    You can also use flashcards, practice questions, blank-page exercises, or short quizzes.

    Do not worry if you struggle to remember something at first. The purpose is to identify gaps so you can work on them.

    2. Spaced Repetition: Review Information Over Time

    Spaced repetition involves reviewing information across multiple sessions instead of concentrating all your study time into one long session.

    This approach is particularly helpful when you need to retain vocabulary, definitions, formulas, dates, or other information over an extended period.

    For example, after learning a topic, you might review it the next day, several days later, and again the following week. Adjust the intervals according to how well you remember the material and how soon you need to use it.

    A simple starting schedule could look like this:

    • Day 1: Learn the information and test your initial understanding.
    • Day 2: Recall the key ideas and correct mistakes.
    • Day 4: Complete another short practice session.
    • Day 7: Test yourself without looking at your notes.
    • Day 14: Review difficult items and check long-term retention.

    This is a flexible example, not a universal schedule. Information that is difficult to recall may need more frequent practice, while material you remember confidently can be reviewed less often.

    For better results, combine spaced repetition with active recall. Try to remember the answer before checking it.

    3. Chunking: Break Large Amounts of Information Into Groups

    Chunking means organizing individual pieces of information into meaningful groups.

    It can make large amounts of material easier to process because you work with related units rather than treating every detail as separate.

    For example, instead of memorizing a long list of historical events in random order, group them by period, cause, or consequence. When learning biology, organize terms according to the system or process they belong to.

    You can use chunking by:

    • Grouping vocabulary by topic.
    • Dividing a chapter into a few major themes.
    • Organizing formulas according to the problems they solve.
    • Grouping historical events into periods or connected developments.
    • Breaking a complex procedure into clear stages.

    The important point is to create groups that make sense. Randomly dividing information into smaller pieces may reduce the amount you handle at once, but meaningful organization makes the material easier to understand.

    4. Mnemonic Devices: Use Shortcuts for Specific Facts

    Mnemonic devices use memorable associations, patterns, phrases, or images to help you recall information.

    They can be especially useful when you need to remember a sequence, a list, or a set of terms.

    Common types include:

    Acronyms: Create a word using the first letters of several items.

    Acrostics: Make a sentence in which the first letter of each word represents an item you need to remember.

    Rhymes and rhythm: Turn information into a short phrase or rhyme that is easier to recall.

    Visual associations: Connect a term with a distinctive mental image.

    For example, a student learning the order of operations in mathematics might use the familiar phrase “Please Excuse My Dear Aunt Sally” to remember parentheses, exponents, multiplication, division, addition, and subtraction.

    Remember that this phrase is a reminder of the categories, not a complete explanation of how to evaluate expressions. Multiplication and division share precedence, as do addition and subtraction, so operations at the same level are handled from left to right.

    Mnemonic devices are useful for particular details, but they should not replace understanding the subject as a whole.

    5. The Method of Loci: Link Information to Familiar Locations

    The method of loci is a memory technique in which you associate information with specific locations along a familiar route or within a familiar place.

    For example, imagine walking through your home. You could associate the first concept you need to remember with the front door, the second with the hallway, and the third with the kitchen.

    During recall, mentally walk through the same route and retrieve the associated information.

    To try this technique:

    1. Choose a familiar place or route.
    2. Select a sequence of distinct locations.
    3. Associate one piece of information with each location.
    4. Make each mental image specific and memorable.
    5. Revisit the route mentally when testing yourself.

    This method can be useful for ordered lists, speech outlines, or sequences of related information. It takes practice, so begin with a short list before applying it to larger amounts of material.

    6. Elaboration: Explain Ideas in Your Own Words

    Elaboration involves adding meaning to new information by explaining it, asking questions about it, and connecting it to knowledge you already have.

    Instead of memorizing a definition word for word, try to explain what the concept means and why it matters.

    For example, when learning about evaporation, ask yourself:

    • What is evaporation?
    • What causes it?
    • How is it different from condensation?
    • Where can I observe it in everyday life?

    Answering these questions forces you to work with the idea rather than simply repeat its definition.

    You can also use the Feynman-style explanation technique: explain a topic in simple language as if you were teaching someone unfamiliar with it. When you cannot explain a step clearly, return to your notes and fill the gap.

    Elaboration is especially helpful for understanding complex theories, scientific processes, and concepts that require more than memorizing isolated facts.

    7. Dual Coding: Combine Words With Useful Visuals

    Dual coding involves representing information in both verbal and visual forms. For students, this might mean combining written explanations with diagrams, timelines, labeled illustrations, or flowcharts.

    For example, when learning the circulatory system, you could read about blood flow while studying a labeled diagram that shows how blood moves through the heart and body.

    The visual should support the explanation rather than distract from it.

    Try these approaches:

    • Draw a simple diagram of a process.
    • Use a timeline to organize historical events.
    • Label the parts of a biological structure.
    • Create a flowchart for a sequence of steps.
    • Pair a mathematical formula with a worked example.

    You do not need artistic skills. Simple, accurate visuals can help you organize information and understand relationships between concepts.

    8. Interleaving: Mix Related Topics During Practice

    Interleaving means alternating between different topics or problem types during a study session instead of practising only one type repeatedly.

    It can be especially useful when you need to recognize which method applies to a particular problem.

    For example, a mathematics student might practise equations, graphs, and word problems in an alternating sequence. This requires the student to identify the appropriate approach instead of automatically repeating the same procedure.

    To use interleaving:

    1. Learn the basic method for each topic.
    2. Choose two or three related topics.
    3. Alternate practice questions from those topics.
    4. Identify why a particular method fits each question.
    5. Review errors and practise the weakest areas again.

    Interleaving is not the same as switching randomly between unrelated tasks. Begin with a basic understanding of each method, then mix them to practise recognizing differences and applying what you know.

    Which Memory Technique Works Best for Each Subject?

    The most useful technique depends on the type of information you need to learn.

    Subject or taskTechniques to try
    Vocabulary and definitionsFlashcards, active recall, spaced repetition
    Biology and scientific processesDiagrams, elaboration, active recall
    History and timelinesChunking, timelines, mnemonic devices
    MathematicsWorked examples, active recall, interleaving
    LanguagesSpaced repetition, retrieval practice, example sentences
    Speeches and presentationsMethod of loci, chunking, practice aloud
    Complex theoriesElaboration, diagrams, self-explanation

    You do not need to use every technique for every subject. Start with the method that matches your learning goal, then combine techniques when it makes sense.

    For example, you might use chunking to organize a chapter, create flashcards for key definitions, and use active recall to test whether you can explain the concepts without notes.

    Common Memory Mistakes Students Should Avoid

    Even useful memory techniques can be less effective when they are applied incorrectly.

    Relying only on rereading. Reading your notes repeatedly may make the material feel familiar, but you also need to practise retrieving it independently.

    Cramming everything into one session. Last-minute study may help with immediate preparation, but it leaves less opportunity to revisit and strengthen learning over time.

    Memorizing without understanding. Some facts must be learned accurately, but complex topics often require you to understand relationships and applications as well as definitions.

    Creating complicated mnemonics for everything. A mnemonic that takes longer to learn than the original information may not be worthwhile. Use these devices selectively.

    Ignoring mistakes. Checking your answers is essential. Identify why an answer was incorrect, review the relevant concept, and try again.

    Studying for too long without a plan. Set a specific goal for each session, such as learning ten terms or explaining one process from memory. A clear target makes it easier to evaluate your progress.

    A Practical 30-Minute Memory Study Routine

    You can combine several techniques in one short study session.

    Minutes 1–5: Organize the material.

    Choose one topic and divide it into manageable sections. Identify the key facts, concepts, or procedures you need to learn.

    Minutes 6–12: Understand and connect.

    Read the relevant material and explain the main ideas in your own words. Use examples or a simple diagram if they clarify the topic.

    Minutes 13–18: Practise recall.

    Close your notes and answer questions, write down key points from memory, or use flashcards.

    Minutes 19–24: Check and correct.

    Compare your answers with the original material. Correct errors and identify information that needs more attention.

    Minutes 25–30: Plan the next review.

    Review the most difficult items once more, then schedule another retrieval session for a later day.

    When you revisit the topic, begin by testing yourself rather than rereading everything from the beginning.

    Final Thoughts

    Memorizing complex information becomes more manageable when you choose techniques that match what you need to learn. Active recall helps you practise retrieving information, spaced repetition gives you opportunities to revisit it, chunking organizes large amounts of material, and elaboration helps you understand what the information means.

    Mnemonic devices, the method of loci, useful visuals, and interleaving can provide additional support for particular learning tasks.

    The key is to practise consistently, check your answers, and return to difficult material over time. No single technique guarantees perfect memory, and different students may find different combinations useful.

    Start with one subject and choose two techniques to try this week. For example, use active recall during your first study session and spaced repetition to review the material over the following days. Track what you can remember and adjust your approach based on the results.

    With a consistent, evidence-informed routine, you can make study time more purposeful and improve your ability to recall and apply what you learn.

  • Concept Mapping for Students: A Practical Learning Guide

    Concept Mapping for Students: A Practical Learning Guide

    Understanding a difficult subject requires more than memorizing definitions and reviewing notes. Students also need to understand how ideas connect, why certain relationships exist, and how individual concepts contribute to a bigger picture. This can be challenging when a lesson contains unfamiliar terms, complicated processes, or information spread across several chapters.

    Concept mapping for students is a practical learning strategy that helps make these connections visible. By organizing concepts into a structured diagram and linking them with meaningful phrases, students can develop a clearer understanding of academic topics, identify gaps in their knowledge, and prepare more effectively for exams.

    Unlike a simple list of notes, a concept map explains how ideas relate to one another. It can show that one concept causes another, forms part of a larger system, depends on a particular condition, or influences an outcome.

    In this guide, you will learn what concept mapping is, how to create a concept map step by step, how to use it in different subjects, and which mistakes to avoid.

    What Is Concept Mapping?

    Concept mapping is a learning technique that represents knowledge through concepts, connecting lines, and linking phrases. The resulting diagram shows relationships between ideas rather than simply listing information.

    A concept is usually written inside a box, circle, or another shape. Lines connect related concepts, while short linking phrases explain the relationship between them.

    For example:

    Plants → require → Sunlight

    Sunlight → provides energy for → Photosynthesis

    Photosynthesis → produces → Glucose and oxygen

    The linking phrases turn separate terms into meaningful statements. Instead of seeing three unrelated facts, you can follow the relationships and explain how the ideas fit together.

    A concept map commonly includes four elements:

    • Concepts: Important ideas, terms, events, or processes.
    • Connecting lines: Visual links between related concepts.
    • Linking phrases: Words that explain the relationship between connected ideas.
    • Cross-links: Connections between different sections of the map that reveal broader relationships.

    Concept maps are especially useful when a subject contains interconnected ideas that need to be understood as a system.

    Why Is Concept Mapping Useful for Students?

    Concept mapping encourages students to organize information actively. Rather than copying material from a textbook, they must decide which concepts matter and determine how those concepts relate to one another.

    1. It Builds Deeper Understanding

    Memorizing a definition may help you answer a basic question, but it may not prepare you to explain a process or apply an idea to a new situation.

    A concept map encourages you to connect definitions with causes, examples, consequences, and related principles.

    For instance, a student studying economics might connect inflation with purchasing power, production costs, consumer demand, and interest rates. These relationships help make the topic more understandable than memorizing each term separately.

    2. It Helps Identify Knowledge Gaps

    When creating a map, you may discover that you know several important terms but cannot explain how they connect.

    Perhaps you understand what photosynthesis means but cannot clearly describe how sunlight, water, carbon dioxide, and glucose relate to the process.

    That uncertainty identifies an area to review. You can return to your notes, consult your textbook, or ask your teacher for clarification before the misunderstanding affects your exam preparation.

    3. It Supports Memory and Revision

    A well-constructed concept map provides a structured overview of a topic. It helps you review major concepts, recall relationships, and identify which areas deserve more attention.

    Research reviews have found positive learning outcomes associated with concept mapping, although its effectiveness varies across subjects, study designs, and teaching approaches. It is best used as part of a broader study routine rather than as a guaranteed shortcut to better grades.

    4. It Encourages Critical Thinking

    Concept mapping can help students evaluate cause-and-effect relationships, compare explanations, and identify links that are not immediately obvious.

    For example, a history student might connect economic pressure, political decisions, public protests, and changes in government. Building these connections encourages the student to consider how several factors contribute to a historical event.

    This makes concept mapping useful for assignments that require explanation, comparison, or analysis.

    How to Create a Concept Map Step by Step

    You do not need special software or artistic skills to create a concept map. You can begin with a blank sheet of paper, a pencil, and your course notes.

    Step 1: Choose a Focus Question

    Start by identifying the question your concept map should answer.

    A focus question keeps your map relevant and prevents it from becoming a collection of unrelated facts.

    For example:

    • How does the water cycle work?
    • What causes inflation?
    • How does the human digestive system function?
    • What factors contributed to a historical revolution?
    • How do ecosystems maintain balance?

    Choose one question that matches your current lesson or study goal.

    Step 2: Identify the Main Concepts

    Review your textbook, lecture notes, or assigned reading. List the key concepts needed to answer your focus question.

    If you are studying the water cycle, your list might include evaporation, condensation, clouds, precipitation, collection, and the Sun’s energy.

    At this stage, focus on important ideas rather than trying to include every sentence from the lesson.

    You can add missing concepts later when you discover that a relationship requires more explanation.

    Step 3: Organize Concepts From General to Specific

    Arrange the concepts according to their level of importance or generality.

    In many concept maps, broader ideas appear near the top, while more specific concepts appear underneath them.

    For example, a biology map could begin with Living Organisms, followed by major groups or systems, then individual structures and their functions.

    Not every topic requires a strict hierarchy. Some subjects are better represented through a sequence, cycle, or network of related factors. Choose the structure that best explains the material.

    Step 4: Connect Related Concepts

    Draw lines between concepts that have a meaningful relationship.

    Do not connect ideas merely because they appear in the same chapter. Ask yourself what makes the relationship important and whether you can explain it clearly.

    For example:

    Water → changes into vapor through → Evaporation

    Water vapor → cools and forms clouds through → Condensation

    Clouds → release water through → Precipitation

    Each connection should communicate a relationship that you could explain in your own words.

    Step 5: Add Linking Phrases

    Linking phrases are one of the most important features of concept mapping.

    Words such as causes, includes, depends on, contributes to, is part of, and results in explain the connection between concepts.

    Compare these two examples:

    • Water cycle — clouds — rain
    • Condensation forms clouds, and clouds produce precipitation.

    The second example communicates more information because the relationships are explicit.

    A useful test is to read each connected set of concepts as a sentence. If the sentence is unclear or inaccurate, revise the connecting phrase or reconsider the relationship.

    Step 6: Add Cross-Links

    Cross-links connect concepts from different branches of your map. They can reveal relationships that might otherwise be overlooked.

    For example, a map about ecosystems could connect sunlight to plant growth, plant growth to food availability, and food availability to animal populations. A cross-link between plant growth and the carbon cycle could show how the same concept contributes to another process.

    You do not need dozens of cross-links. Add them when they explain an important relationship that improves your understanding.

    Step 7: Check and Improve the Map

    Review your finished map using your course materials.

    Ask yourself:

    • Are the main concepts accurate?
    • Do the linking phrases explain the relationships clearly?
    • Have I missed an important concept?
    • Are any connections misleading or unsupported?
    • Can I explain the map without reading directly from my notes?

    Correct mistakes and remove unnecessary information. A good concept map is not the one with the most boxes; it is the one that communicates the topic accurately and clearly.

    Concept Mapping Example: Understanding an Ecosystem

    Suppose you are studying how an ecosystem works. A concept map could begin with Ecosystem as the main concept and branch into living organisms, nonliving factors, food chains, and energy flow.

    The relationships might include:

    • Sunlight provides energy for Producers.
    • Producers provide food for Primary Consumers.
    • Primary Consumers may be eaten by Secondary Consumers.
    • Decomposers break down Dead Organic Matter.
    • Nutrients released by decomposition can be reused by Plants.

    You could then add connections involving water, soil, temperature, and habitat conditions.

    This map shows that an ecosystem is not simply a collection of organisms. It is a network of relationships involving energy, nutrients, and environmental conditions.

    It can also help you prepare for questions such as, “What might happen if the population of a particular consumer decreases?” By tracing the connections, you can begin to reason about possible effects on other organisms.

    Concept Mapping vs. Mind Mapping: What Is the Difference?

    Concept maps and mind maps both organize information visually, but they serve somewhat different purposes.

    FeatureConcept mappingMind mapping
    Main purposeExplain relationships between conceptsOrganize and explore ideas
    Typical structureOften hierarchical or network-basedOften branches outward from a central topic
    Connecting phrasesUsed to explain relationships explicitlyOften optional
    Cross-linksImportant for showing connections across branchesMay be used, but are not always central
    Best suited forUnderstanding systems, processes, and relationshipsBrainstorming, planning, and reviewing broad topics

    For example, a mind map about climate change might list causes, effects, and solutions around a central topic. A concept map would go further by explicitly connecting fossil fuel use to greenhouse gas emissions and emissions to warming, while linking solutions to the problems they address.

    Choose concept mapping when your goal is to explain how ideas relate. Choose mind mapping when you want to generate ideas or organize a topic quickly. You can also use both techniques during different stages of learning.

    How to Use Concept Mapping in Different Subjects

    Concept mapping can be adapted to many areas of study.

    Science and Biology

    Use concept maps to explain biological systems, chemical processes, scientific principles, and relationships between variables.

    For example, you could connect cell structures with their functions or map how energy moves through an ecosystem. In science, accurate connecting phrases are particularly important because they help distinguish established relationships from assumptions.

    History and Social Studies

    Build maps around historical events, causes, consequences, important people, and social conditions.

    A map about a revolution could connect economic inequality, political conflict, public opposition, and changes in leadership. Use the links to distinguish direct causes from contributing factors.

    Mathematics

    Organize mathematical concepts, formulas, definitions, and problem-solving methods.

    A concept map about quadratic equations could connect the standard form of an equation with factoring, completing the square, graphing, and the quadratic formula.

    Add notes about when each method is useful. Then solve practice problems to make sure you can apply the relationships rather than merely recognize them.

    Literature and Language Learning

    Connect literary themes with characters, events, settings, and evidence from a text. In language learning, connect grammatical rules with examples and related sentence structures.

    For example, a literature map might show how a character’s decisions influence the conflict and contribute to a theme. This can help organize ideas before writing an analytical essay.

    Common Concept Mapping Mistakes to Avoid

    Using too many concepts. A crowded map can obscure the relationships that matter most. Start with the main ideas and add details only when they help answer your focus question.

    Leaving connecting lines unexplained. Lines without linking phrases may show that concepts are related but not explain how. Use clear, accurate phrases whenever possible.

    Copying notes without processing them. Copying information into boxes does not automatically create understanding. Summarize ideas in your own words and decide why each relationship matters.

    Ignoring inaccurate connections. A diagram may look logical while containing incorrect information. Check your map against reliable learning materials and correct any unsupported claims.

    Never testing your knowledge. Creating a map is only one part of learning. Try explaining the relationships without looking at the diagram, then answer questions or solve problems related to the topic.

    Spending too long on design. Use simple shapes and readable labels. The value comes from thinking about the relationships, not from making the diagram visually elaborate.

    A Simple Concept Mapping Study Routine

    Try this 25-minute session when learning a new topic:

    1. Minutes 1–5: Read your notes and identify the focus question and key concepts.
    2. Minutes 6–12: Arrange the concepts and connect them with meaningful linking phrases.
    3. Minutes 13–17: Add cross-links and check the accuracy of important relationships.
    4. Minutes 18–22: Cover your notes and explain the map from memory.
    5. Minutes 23–25: Identify gaps, correct mistakes, and note questions for further review.

    For complex subjects, you may need more time. You can also create a first version after a lesson and update it as your understanding develops.

    Paper-based maps are useful for quick drafting, while digital tools can make large maps easier to rearrange and share. The best option is the one that lets you focus on the concepts instead of the technology.

    Final Thoughts

    Concept mapping for students offers a structured way to organize knowledge, explain relationships, and identify gaps in understanding. By choosing a clear focus question, arranging important concepts, using meaningful linking phrases, and checking connections carefully, you can build a more complete picture of a challenging subject.

    The most important step is to create the map yourself and use it to explain the material, rather than treating it as a decorative summary. Combine concept maps with retrieval practice, textbook reading, and subject-specific exercises to strengthen your learning routine.

    Start with one topic from your next lesson. Identify its main concepts, connect them with accurate phrases, and see whether you can explain the resulting map without your notes. With regular practice, concept mapping can become a useful tool for learning more thoughtfully and preparing for academic assessments.

  • How to Use Mind Maps to Understand Difficult Subjects

    How to Use Mind Maps to Understand Difficult Subjects

    Understanding a difficult subject can feel overwhelming when your notes are filled with long paragraphs, complicated definitions, and ideas that seem unrelated. Whether you are studying biology, mathematics, history, economics, or another challenging subject, it can be difficult to see how individual concepts fit together.

    One practical way to organize information is to use mind maps. A mind map turns a central topic into a visual structure of connected ideas, helping you break complex material into smaller, more manageable sections.

    Learning how to use mind maps for studying can help you organize your notes, identify relationships between concepts, review important information, and prepare for exams more effectively. Instead of simply rereading pages of notes, you can create a visual overview of what you are learning and use it to test your understanding.

    In this guide, you will learn what mind maps are, how to create them step by step, which subjects benefit from them, and how to use them as part of a productive study routine.

    What Is a Mind Map?

    A mind map is a visual learning tool that organizes information around a central topic. Related ideas branch out from the main topic, and smaller branches provide supporting details, examples, definitions, or explanations.

    For example, if you are studying the human digestive system, you could write Human Digestive System in the center of a page. Your main branches might include the mouth, esophagus, stomach, small intestine, large intestine, and digestive enzymes. Smaller branches could explain each organ’s function and its role in digestion.

    This structure makes it easier to see how different parts of a topic relate to one another.

    Mind maps usually include:

    • A central topic: The main subject you want to understand.
    • Main branches: The major categories or concepts.
    • Sub-branches: Supporting facts, explanations, examples, and definitions.
    • Keywords: Short phrases that represent important information.
    • Visual cues: Colors, symbols, arrows, or simple drawings that help distinguish ideas.

    Unlike traditional notes, which are often written in a linear format, mind maps show information in a connected visual arrangement.

    Why Are Mind Maps Useful for Difficult Subjects?

    Difficult subjects often contain many related concepts that must be understood together. A mind map helps organize these concepts so you can focus on both individual details and the bigger picture.

    1. They Break Complex Topics Into Smaller Parts

    A large chapter can seem difficult because it contains too much information to process at once. A mind map divides the chapter into smaller categories, allowing you to concentrate on one section at a time.

    For instance, a chapter about climate change might be divided into causes, environmental effects, economic consequences, and possible solutions. Each branch can then be developed separately.

    This approach makes the material feel more manageable and gives you a clear starting point.

    2. They Help You Identify Connections

    Understanding a subject involves more than memorizing definitions. You also need to understand how ideas influence, support, or differ from one another.

    A mind map can reveal these relationships. In economics, for example, you could connect inflation with purchasing power, production costs, interest rates, and consumer demand.

    Seeing these relationships together may help you develop a deeper understanding of the topic rather than treating each concept as an isolated fact.

    3. They Make Revision More Organized

    When exam preparation begins, students often need to review several chapters in a limited amount of time. A well-organized mind map provides a compact overview of the most important concepts.

    You can use it to identify key definitions, major processes, supporting examples, and areas that require additional revision.

    However, a mind map should complement detailed notes and practice questions rather than replace every other study method.

    4. They Encourage Active Learning

    Creating a mind map requires you to decide which ideas are important and how they relate to the main topic. This process can encourage you to organize information in your own words.

    Research on concept mapping has found positive learning benefits across several educational settings, although results depend on how the maps are created and used. For stronger revision, try drawing your map from memory instead of copying information directly from a textbook.

    How to Use Mind Maps for Studying: A Step-by-Step Guide

    You do not need advanced drawing skills or expensive software to create an effective mind map. A sheet of paper and a pen are enough to get started.

    Step 1: Choose One Specific Topic

    Begin with a topic that is narrow enough to organize clearly.

    Instead of creating a map for an entire subject such as biology, choose a specific chapter or concept, such as photosynthesis, cell division, or the nervous system.

    A focused topic makes it easier to identify the most important information without overcrowding the page.

    Before you begin, ask yourself what you want to understand by the end of the study session.

    Step 2: Write the Main Idea in the Center

    Place the topic in the center of your page and draw a circle or shape around it.

    For example, if you are studying photosynthesis, write Photosynthesis in the center. You can add a small drawing of a leaf if it helps you remember the topic.

    Keep the central idea short and easy to recognize. The purpose is to establish a clear starting point for the rest of your map.

    Step 3: Create the Main Branches

    Identify approximately four to seven major categories related to the central topic. The exact number depends on the complexity of the material.

    For a photosynthesis mind map, the main branches might be:

    • Definition
    • Requirements
    • Location
    • Process
    • Products
    • Importance

    Draw a line from the central topic to each category.

    These main branches provide the basic structure of your map. If you cannot identify the major categories, review your textbook headings or lecture notes before continuing.

    Step 4: Add Supporting Details

    Expand each main branch with relevant information.

    Under Requirements, for example, you might include sunlight, water, carbon dioxide, and chlorophyll. Under Products, you could add glucose and oxygen.

    Use short keywords and phrases instead of copying complete paragraphs. If a branch becomes crowded, simplify the wording or create another level of sub-branches.

    The goal is to organize the information clearly, not to fit every sentence from your textbook onto one page.

    Step 5: Show Relationships Between Ideas

    Look for connections that explain how the different parts of the topic work together.

    In a photosynthesis map, you could use arrows to show that plants absorb light energy and use it during the process. You might connect sunlight, water, and carbon dioxide to the production of glucose and oxygen.

    For subjects such as history, arrows can show cause-and-effect relationships. In mathematics, they can connect a formula to the conditions in which it is used.

    Label important arrows with words such as causes, requires, leads to, or results in when the relationship is not obvious.

    Step 6: Use Colors and Symbols Carefully

    Colors can help distinguish categories, but using too many can make your map harder to read.

    For example, you could use one color for definitions, another for examples, and a third for processes or consequences. Simple symbols can highlight formulas, dates, important terms, or questions you still need to answer.

    Keep your visual system consistent across the map.

    Remember that decoration is optional. A simple, readable map is more useful than a beautiful design that takes too long to create.

    Step 7: Test Your Understanding From Memory

    This is one of the most important steps.

    After completing your initial map, put your textbook and notes aside. On a blank sheet of paper, try to recreate the central topic, major branches, and key details from memory.

    Then compare your new map with the original material.

    Notice which concepts you remembered correctly, which connections you missed, and which details you could not explain. Review those areas before testing yourself again.

    This method combines visual organization with retrieval practice, giving you a more active way to revise than simply looking at a completed map.

    Example of a Mind Map for a Difficult Subject

    Imagine that you are studying the causes and effects of climate change. You could organize the topic as follows:

    Central topic: Climate Change

    • Causes
      • Burning fossil fuels
      • Deforestation
      • Greenhouse gas emissions
    • Environmental effects
      • Rising global temperatures
      • Melting glaciers
      • Sea-level rise
      • Changes in ecosystems
    • Human impacts
      • Food and water challenges
      • Health risks
      • Damage to infrastructure
    • Possible solutions
      • Renewable energy
      • Energy efficiency
      • Forest conservation
      • Lower-emission transport

    To make this map more useful, add arrows connecting causes to their effects and solutions to the problems they address. You can also add examples from your course materials.

    This structure gives you an overview of the topic while helping you identify relationships that might appear in essay questions or examinations.

    Which Subjects Are Best for Mind Mapping?

    Mind maps can be adapted to many academic subjects, although some topics benefit more from them than others.

    Biology and Other Sciences

    Use mind maps to organize processes, systems, classifications, and relationships. For example, a biology map could connect cell structures with their functions, while a chemistry map could organize types of chemical reactions.

    For complicated processes, add numbered stages or arrows to show the correct sequence.

    History and Social Studies

    Create branches for important events, causes, consequences, people, dates, and historical movements.

    A map about a historical revolution could connect economic conditions, political tensions, key events, and long-term consequences. This can help you prepare for questions that ask you to explain why something happened.

    Mathematics

    Mind maps can help organize formulas, definitions, problem types, and solution methods.

    For example, a map about quadratic equations could include standard form, factoring, completing the square, and the quadratic formula. Under each branch, add a sample problem and note when that method is useful.

    Mind maps are not a substitute for solving problems. Use them to organize methods, then practise applying those methods independently.

    Literature and Language Learning

    For literature, connect characters, themes, settings, conflicts, and important quotations from your assigned text.

    For language learning, you can organize vocabulary by topic, group related words, and connect grammar rules with examples. This approach may make it easier to see patterns across related concepts.

    Common Mind Mapping Mistakes to Avoid

    Mind maps are most useful when they support understanding. A few common mistakes can reduce their effectiveness.

    Copying entire paragraphs. Long sentences make branches crowded and defeat the purpose of creating a visual overview. Summarize information using keywords and short phrases.

    Including too much information. Trying to include every detail from a chapter can make the map confusing. Focus on major concepts first, then add details that explain important relationships.

    Making the map decorative instead of useful. Excessive colors, images, and formatting can consume time without improving your understanding. Choose visual elements that have a clear purpose.

    Creating a map without checking accuracy. An attractive map can still contain incorrect definitions or misleading connections. Compare it with reliable course materials and correct any mistakes.

    Only looking at the finished map. Recognition is not the same as being able to recall or explain information independently. Recreate the map from memory and answer questions without looking at your notes.

    Using mind maps for everything. Some tasks require detailed written explanations, calculations, experiments, or extended reading. Use mind maps when they suit the material, and combine them with other study methods when necessary.

    How to Include Mind Maps in Your Study Routine

    You do not need to spend hours creating a map for every lesson. A short, structured routine can make the technique easier to maintain.

    Try this 25-minute study session:

    1. First 5 minutes: Review the lesson and identify its main ideas.
    2. Next 10 minutes: Create a mind map using keywords, branches, and important connections.
    3. Next 5 minutes: Put your notes aside and recreate the main structure from memory.
    4. Final 5 minutes: Check your work, correct mistakes, and write down questions that still need answers.

    For longer or more difficult topics, extend the session as needed.

    Return to your map during later revision sessions. Try recalling its branches before checking the original, and use practice questions to determine whether you can apply what you learned.

    You can create mind maps on paper or use a digital tool. Paper is convenient when you want to work quickly without distractions, while digital maps can be useful when you need to reorganize branches or work with a large topic. Choose the format that helps you think clearly.

    Final Thoughts

    Learning how to use mind maps for studying can give you a practical way to organize complex information, identify connections, and review challenging subjects. By placing the main topic at the center, developing clear branches, adding relevant details, and testing yourself from memory, you can turn a large amount of information into a more manageable learning structure.

    The most effective approach is to keep your maps focused, accurate, and easy to read. Use them alongside practice questions, detailed notes, and regular revision rather than treating them as a complete replacement for other learning methods.

    Start with one difficult chapter, create a simple mind map, and see whether it helps you explain the topic more clearly. With regular practice, mind mapping can become a useful part of your study routine and help you approach challenging material with greater confidence.

  • How to Make Group Study Sessions More Productive

    How to Make Group Study Sessions More Productive

    Studying with classmates can be a useful way to understand difficult subjects, exchange ideas, and prepare for exams. However, not every group study session leads to meaningful progress. Sometimes, students spend more time chatting, checking their phones, or reading the same notes together than actually learning.

    The key to productive group study sessions is having a clear purpose, a simple plan, and activities that require everyone to participate. When students explain concepts to one another, ask questions, solve problems, and identify gaps in their knowledge, studying together can become more engaging and effective.

    Whether you are preparing for a university examination, working through a challenging course, or revising with friends, a few practical changes can help you make better use of your time.

    In this guide, you will learn how to organize a study group, divide responsibilities, stay focused, handle disagreements, and use collaborative learning techniques to improve your understanding.

    What Makes a Group Study Session Productive?

    A productive study session is one in which participants make measurable progress toward a learning goal. That might mean understanding a difficult concept, solving a set of practice questions, reviewing an assignment, or identifying topics that need further revision.

    Simply sitting together with textbooks open does not guarantee effective learning. Group members need to engage actively with the material rather than rely on conversation or passive reading alone.

    Effective study groups often share several characteristics:

    • Clear objectives: Everyone knows what the session should accomplish.
    • Active participation: Each member contributes ideas, questions, or explanations.
    • Mutual support: Students help one another understand concepts without embarrassment.
    • Good time management: The group balances discussion with independent thinking.
    • Shared accountability: Members encourage one another to prepare and follow through.
    • Individual responsibility: Everyone remains responsible for learning the material personally.

    Research on collaborative learning suggests that peer discussion and explanation can support understanding. However, the benefits depend on how the group works, and group study does not guarantee higher grades for every student or subject.

    1. Set a Clear Goal Before the Session

    One of the easiest ways to improve group study is to decide what you want to achieve before meeting.

    Without a specific goal, the session can become an open-ended conversation about everything students need to study. This often leads to unfinished tasks and uncertainty about whether the meeting was worthwhile.

    Instead, choose one or two realistic objectives.

    For example, your group might aim to:

    • Review two chapters of a biology course.
    • Solve ten practice problems in mathematics.
    • Compare key theories for a psychology examination.
    • Discuss the main arguments in a history reading.
    • Identify and correct mistakes from a previous test.

    Share the objectives with everyone before the meeting so participants can prepare relevant materials.

    At the end, review what the group completed and identify anything that remains unclear. This gives everyone a simple way to measure progress.

    2. Keep the Group Small Enough for Everyone to Participate

    The ideal group size depends on the subject, the activity, and the students involved. However, a small group of around three to five students is often a practical starting point because it gives each person opportunities to contribute without making discussion difficult to manage.

    Very large groups can make it easier for some members to remain silent while others dominate the conversation. Smaller groups can also be easier to schedule and keep focused.

    When choosing group members, look for classmates who are willing to prepare, ask questions, explain ideas, and respect different learning styles.

    You do not need to choose only friends or students with identical grades. Different perspectives can be helpful, provided everyone participates constructively.

    If one member understands a topic well, they can explain it to others. In return, another student might identify a mistake, offer a different example, or ask a question that reveals a gap in everyone’s understanding.

    The goal is not to create a competition. It is to make learning easier through cooperation.

    3. Create a Simple Study Session Agenda

    A short agenda helps your group use its time intentionally. It does not need to be complicated or overly formal.

    For a 60-minute session, you could use this structure:

    TimeActivity
    5 minutesAgree on goals and review preparation
    10 minutesIdentify difficult concepts
    20 minutesExplain topics and solve practice questions
    15 minutesComplete a group quiz or discussion
    5 minutesReview mistakes and unanswered questions
    5 minutesDecide what each person should study next

    Adjust the timing according to the subject and the group’s needs. A complex problem-solving session may require longer practice periods, while a short revision meeting may need less discussion.

    Keep the agenda visible during the session. If the group gets distracted, return to the next activity instead of allowing the conversation to drift.

    A clear structure also helps everyone understand that group study is a learning activity, not simply a social gathering.

    4. Use Active Learning Instead of Just Reading Notes

    One of the most common group study mistakes is reading notes aloud while everyone else listens. This may help introduce a topic, but it does not necessarily show whether each student understands or remembers the information.

    Instead, choose activities that require participants to retrieve information, explain concepts, and apply what they have learned.

    Try the teach-back method

    Ask one student to explain a concept in simple language without reading directly from the textbook. Other members can ask questions or point out anything that needs clarification.

    For example, a biology student might explain how photosynthesis works, while the rest of the group checks whether the explanation covers the important stages.

    Quiz one another

    Prepare questions before the session and take turns answering them. Flashcards, short-answer questions, and practice tests can help reveal gaps in understanding.

    Solve problems together

    For mathematics, physics, economics, or similar subjects, work through practice problems. Ask each person to explain the reasoning behind their answer, not just provide the final result.

    Compare different explanations

    If two students approach a problem differently, discuss why. Compare the steps, check the evidence, and use reliable course materials to verify the result.

    These activities make participation more meaningful and help students discover what they still need to practise independently.

    5. Assign Roles to Keep Everyone Involved

    When responsibilities are unclear, one student may end up organizing everything while others contribute very little. Assigning simple roles can help distribute the work.

    Useful roles include:

    • Facilitator: Keeps the group focused on its objectives.
    • Timekeeper: Helps the group move between activities.
    • Question leader: Prepares questions and encourages discussion.
    • Note-taker: Records important explanations and unresolved questions.
    • Checker: Verifies answers against textbooks, lecture materials, or other reliable course resources.

    You do not need a separate person for every role. In a small group, students can combine responsibilities or rotate them between sessions.

    Rotating roles is especially helpful because it gives everyone a chance to practise different skills. A student who usually takes notes may benefit from leading a discussion, while a confident speaker may learn by checking answers carefully.

    Remember that roles should support learning, not create unnecessary administration. Keep them simple and flexible.

    6. Encourage Questions and Respectful Discussion

    A good study group should make it easier to admit when something is confusing.

    Students sometimes avoid asking questions because they worry that others will judge them. Unfortunately, this can allow misunderstandings to continue until the examination.

    Establish a simple rule: questions are welcome, and disagreements should focus on ideas rather than personal criticism.

    Use phrases such as:

    • “Could you explain how you reached that answer?”
    • “Can we check this point in the lecture notes?”
    • “I understood it differently. Let’s compare our reasoning.”
    • “Which part of this concept is still unclear?”

    Encourage students to explain their reasoning and support claims with evidence. If the group cannot resolve a disagreement, write down the question and ask the instructor or consult an authoritative course source.

    Do not assume that the most confident speaker is always correct. A respectful group checks its answers instead of accepting them without discussion.

    7. Manage Distractions and Keep the Session Focused

    Phones, unrelated conversations, and social media can quickly reduce the value of a group meeting.

    Before starting, agree on a few practical ground rules. For example, everyone might silence notifications, keep phones away unless needed for studying, and save unrelated conversations for the break.

    Choose a location that suits the activity. A quiet library room may be suitable for detailed revision, while a collaborative study space may work better for discussing problems.

    Online study groups need similar boundaries. Use a shared agenda, keep unrelated browser tabs closed, and agree on how participants will ask questions.

    If concentration begins to drop, take a short break rather than forcing everyone to continue. After the break, return to a specific task.

    The goal is not to eliminate every moment of conversation. It is to make sure that social interaction does not replace the learning activity the group agreed to complete.

    8. Use Shared Digital Tools Carefully

    Digital tools can make it easier to coordinate sessions, organize notes, and prepare practice materials.

    Your group might use a shared document for summaries, a calendar for scheduling, flashcard software for revision, or a video meeting platform when members cannot meet in person.

    To keep these tools useful:

    • Create one clearly organized folder for each course.
    • Label documents with descriptive names and dates.
    • Record unresolved questions separately from confirmed answers.
    • Give members clear editing responsibilities.
    • Check information against course materials before sharing it.

    Be careful not to turn a shared document into a collection of copied notes that nobody reviews. Each student should still test their own understanding and follow the institution’s rules on academic integrity and collaboration.

    If you use AI tools to generate practice questions or explanations, verify important details with reliable course materials. Do not share private student information or upload restricted course content without permission.

    9. Make Sure Everyone Prepares Before the Meeting

    Group study works better when members arrive with some familiarity with the material.

    If everyone encounters the topic for the first time during the session, much of the meeting may be spent reading basic information instead of discussing difficult questions.

    Before each meeting, ask participants to complete a small preparation task. They might read a specified section, review lecture slides, attempt three practice questions, or bring two questions they could not answer.

    Preparation does not need to take hours. The aim is to give the group a useful starting point.

    At the beginning of the meeting, ask each person to identify one topic they understand and one they find challenging. This helps the group prioritize its time.

    If a member has not prepared, avoid spending the entire session repeating material for that person. Offer a brief explanation where appropriate, then continue with the planned activities.

    10. Finish With a Quick Review and Individual Study Plan

    The final few minutes of a group study session are valuable. Use them to check what the group achieved and decide what needs further attention.

    Ask each member to answer three questions:

    1. What did I understand better today?
    2. Which question or concept still confuses me?
    3. What will I review independently before the next session?

    Record unanswered questions in a shared list and decide who will verify them. This prevents uncertainty from being forgotten once the meeting ends.

    After the session, spend a few minutes recalling the main concepts without looking at the group notes. Independent recall helps you check what you personally remember, rather than relying only on explanations heard from others.

    Group study should support your individual learning, not replace it. You may understand a topic during discussion but still need practice to recall and apply it on your own.

    Common Group Study Mistakes to Avoid

    Even a well-intentioned group can become less productive if it develops unhelpful habits.

    Meeting without a plan: Choose clear objectives before starting.

    Letting one person do all the work: Rotate responsibilities and invite every member to contribute.

    Confusing familiarity with understanding: Use quizzes and practice problems instead of relying only on rereading.

    Accepting incorrect answers: Verify uncertain information with course materials or an instructor.

    Spending too much time socializing: Schedule breaks and return to the agenda afterward.

    Depending entirely on the group: Review material independently so you can answer questions without help.

    Holding meetings that are too long: Choose a manageable duration and take breaks when needed.

    Recognizing these problems early helps the group adjust before meetings become frustrating or ineffective.

    Frequently Asked Questions

    How long should a group study session last?

    There is no single ideal duration. Around 45–90 minutes can be a practical starting point for many groups, depending on the subject and participants. Use a clear agenda and take breaks when concentration drops.

    How many students should be in a study group?

    A group of three to five students is often manageable because everyone can participate. Larger groups can also work if they have clear roles, structured activities, and enough opportunities for each person to contribute.

    Is group study better than studying alone?

    Neither method is always better. Group study can help students exchange explanations, discuss difficult concepts, and stay accountable. Individual study provides time for focused practice and checking personal understanding. Combining both approaches is often useful.

    What should students do during group study?

    Use activities such as teaching concepts to one another, answering practice questions, discussing mistakes, solving problems, and reviewing difficult material. Begin with a clear goal and finish by identifying what each student needs to revise independently.

    How can an online study group stay productive?

    Set a meeting agenda, assign simple roles, use a shared document, silence unnecessary notifications, and ask everyone to prepare beforehand. Keep the meeting focused on specific learning tasks and verify shared information before relying on it.

    Final Thoughts

    Making group study sessions more productive requires more than finding classmates and opening textbooks. It involves setting clear goals, preparing before meetings, encouraging active participation, and using activities that help everyone understand the material.

    Start small: choose a manageable group, agree on one learning objective, and plan a session that includes explanations, practice questions, and a short review. Keep distractions under control, respect different viewpoints, and make time for independent study afterward.

    A productive study group should help every member become a more confident and independent learner. When collaboration is organized around meaningful learning goals, studying together can become a valuable part of your academic routine.

  • Why Sleep Matters for Student Learning and Memory

    Why Sleep Matters for Student Learning and Memory

    Students often sacrifice sleep to finish assignments, prepare for exams, or revise difficult subjects. Staying up late may seem like a practical way to gain extra study time, especially when deadlines are approaching. However, sleep is an essential part of the learning process, not simply time away from academic work.

    Understanding the importance of sleep for students can help you make better decisions about studying, remembering information, managing stress, and preparing for exams. Sleep supports attention, memory, emotional well-being, and the brain processes involved in learning new material.

    Whether you are in school, college, or university, developing healthy sleep habits can help you approach your studies with a clearer mind and a more sustainable routine.

    In this guide, you will learn how sleep affects learning and memory, how much sleep students generally need, what happens when you regularly sleep too little, and how to build a sleep routine that supports academic success.

    Why Is Sleep Important for Students?

    Sleep allows the brain and body to carry out important processes that support everyday functioning. Although you are not actively studying while asleep, your brain remains active through different stages of sleep.

    These stages contribute to physical recovery, attention, memory processing, and emotional regulation. When students consistently get enough quality sleep, they are better positioned to concentrate, learn new information, and manage the demands of academic life.

    Sleep is especially important for students because learning often involves several mental tasks at once. You may need to understand a new concept, remember earlier lessons, solve problems, and apply information under time pressure.

    Insufficient sleep can make these tasks more difficult. Getting adequate rest does not guarantee high grades, but it supports the mental abilities students rely on to learn effectively.

    1. Sleep Helps Strengthen Memory

    One of the main reasons sleep matters for students is its relationship with memory.

    When you learn something new, such as a mathematical formula, a historical event, or a scientific concept, your brain begins forming memories of that information. These memories may initially be fragile and require further processing.

    Sleep helps the brain strengthen and organize some of the information learned during the day. This process is often called memory consolidation.

    For example, imagine studying a list of vocabulary words in the evening. Reviewing the words helps you learn them, while a good night’s sleep supports the processes that help you retain what you practised.

    This is why effective studying involves more than the number of hours spent reading. It also involves giving your brain opportunities to process and retain information.

    Practical tip: Review important material before bed if it fits your schedule, but do not sacrifice sleep to do so. Combine regular revision with adequate rest rather than relying on a single late-night study session.

    2. Sleep Improves Attention and Concentration

    Concentration is essential for understanding lessons, reading academic material, and completing assignments accurately.

    When you are tired, you may find yourself rereading the same paragraph, losing track of a teacher’s explanation, or making mistakes on questions you normally understand. You might also become distracted more easily.

    Sleep supports the attention and alertness needed to stay engaged with academic tasks. Without enough rest, even a familiar subject can feel unusually difficult.

    Consider two students preparing for an examination. One studies late into the night and arrives exhausted. The other follows a planned revision schedule and gets sufficient sleep. The second student may be better prepared to concentrate during the test because they have allowed time for recovery.

    Of course, preparation and prior knowledge also matter. Sleep is one part of academic performance, not the only factor.

    To support concentration, try maintaining a regular sleep schedule, taking breaks during long study sessions, and avoiding repeated all-night study routines.

    3. Sleep Supports Learning New Information

    Learning requires the brain to take in new information, understand it, connect it to existing knowledge, and retrieve it when needed.

    Sleep contributes to this process in more than one way. Being well-rested before a lesson can help you pay attention and take in information. Sleeping after learning supports memory processes that help preserve some of what you studied.

    This means both the night before and the night after an important learning session can matter.

    For instance, if you are preparing for a biology examination, you could review cell structures, test yourself using flashcards, and then follow your normal sleep routine. The next day, return to the same material and check what you remember.

    This approach combines active learning with rest. It is generally more sensible than repeatedly studying while exhausted and hoping that extra hours will make up for poor concentration.

    4. Sleep Can Help With Problem-Solving

    Academic work often requires more than memorizing facts. Students must also compare ideas, interpret evidence, solve equations, and apply concepts to unfamiliar questions.

    Sleep supports cognitive functions involved in thinking and decision-making. When you are sleep-deprived, it may become harder to consider alternatives, notice errors, or work through a complicated problem patiently.

    Suppose you are struggling with a difficult mathematics problem late at night. Continuing to work when you are exhausted may not be the most useful option. Depending on your deadline, it may be better to note where you became stuck, get adequate rest, and return to the problem with a clearer mind.

    A break and a night of sleep will not automatically solve every problem. However, adequate rest helps support the mental processes you need to work through challenges.

    5. Sleep Influences Mood and Stress Levels

    Student life can involve deadlines, competitive environments, financial concerns, and pressure to achieve good results. Poor sleep can make it more difficult to manage these challenges.

    When you do not sleep enough, you may feel more irritable, impatient, worried, or emotionally overwhelmed. Small academic setbacks can seem more serious, and it may become harder to respond calmly to feedback or unexpected problems.

    Adequate sleep supports emotional well-being and can make daily demands easier to manage. It does not eliminate exam anxiety or other mental health concerns, but it is an important part of looking after yourself.

    To support your mood during busy academic periods:

    • Avoid making all-night studying a regular habit.
    • Keep some time for relaxing activities and social connections.
    • Use a realistic study schedule instead of working continuously.
    • Try to maintain consistent sleeping and waking times.
    • Seek support if stress becomes difficult to manage.

    Academic success should not require sacrificing your well-being every week.

    6. How Much Sleep Do Students Need?

    The amount of sleep you need depends largely on your age. General recommendations from the Centers for Disease Control and Prevention and sleep medicine experts provide a useful starting point.

    Age groupRecommended sleep per 24 hours
    Children aged 6–129–12 hours
    Teenagers aged 13–178–10 hours
    Adults aged 18–60At least 7 hours

    Individual needs can vary, and sleep quality matters alongside the number of hours you spend in bed.

    University students who are adults should generally aim for at least seven hours of sleep each night. Teenagers usually need more. If you regularly wake up feeling exhausted despite allowing enough time for sleep, consider discussing the problem with a healthcare professional.

    These recommendations are general guidelines, not a test you need to pass perfectly every night. Focus on establishing a consistent routine that gives you enough opportunity to rest.

    7. What Happens When Students Do Not Get Enough Sleep?

    Occasionally having a short night may happen during a demanding week. However, regularly getting insufficient sleep can affect both academic work and everyday well-being.

    Possible effects include:

    Reduced concentration: You may struggle to follow lectures, complete readings, or stay focused during examinations.

    Memory difficulties: Learning and recalling information can become more challenging.

    Slower responses: Tiredness may affect how quickly you process information and react to situations.

    More mistakes: Fatigue can make it harder to check your work carefully or make sound decisions.

    Mood changes: You may feel more irritable, stressed, or emotionally sensitive.

    Lower daily energy: Ordinary activities may feel more demanding, leaving less energy for classes, exercise, and social interaction.

    Sleep deprivation affects people differently, and one poor night does not determine your academic future. The greater concern is a repeated pattern of insufficient or poor-quality sleep.

    If your schedule consistently prevents you from getting enough rest, it may be time to review your workload and study habits rather than simply trying to tolerate the exhaustion.

    8. Why All-Nighters Are Usually a Poor Study Strategy

    An all-nighter is a study session that continues through the night with little or no sleep. Some students use this approach before examinations because they believe every extra hour of revision will improve their results.

    However, more study time does not always mean more effective learning.

    If you stay awake for most of the night, you may spend longer with your notes but find it harder to concentrate, retrieve information, and think clearly the next day. You also lose an opportunity for sleep-related memory processing.

    A better approach is to spread revision across several days whenever possible.

    Try this instead:

    1. Identify the topics most important for the examination.
    2. Divide them into manageable study sessions.
    3. Use practice questions and active recall to check your understanding.
    4. Review difficult topics again later.
    5. Stop studying at a reasonable time and allow enough time for sleep.

    If an examination is approaching and you have not covered everything, prioritize the most important material rather than sacrificing the entire night. A realistic plan is usually more helpful than attempting to learn an entire course at once.

    9. Practical Tips for Better Sleep During the School Year

    Healthy sleep habits do not need to be complicated. Small, consistent changes can help you create a routine that fits around classes, assignments, and personal responsibilities.

    Keep a consistent sleep schedule

    Try to go to bed and wake up at roughly the same time every day, including weekends when practical. A regular schedule helps establish a predictable sleep-wake rhythm.

    Create a relaxing bedtime routine

    Set aside time before bed to slow down. You could prepare your bag for the next day, take a warm shower, read something relaxing, or listen to quiet music.

    Reduce screen use before bedtime

    Phones, laptops, and other devices can keep you mentally engaged when you should be winding down. Try putting them away at least 30 minutes before bed and avoid activities that make you feel more alert or stressed.

    Be mindful of caffeine

    Coffee, energy drinks, and some teas contain caffeine, which can interfere with sleep for several hours. If you have difficulty falling asleep, try limiting caffeine in the afternoon and evening.

    Make your sleep environment comfortable

    Where possible, keep your sleeping area dark, quiet, and comfortably cool. Reduce interruptions from notifications and other devices.

    Get daylight and physical activity

    Spending time outdoors during the day and being physically active can support a healthy sleep routine. Choose activities that suit your schedule and ability.

    Plan your study sessions earlier

    Avoid leaving every difficult task until late at night. Planning revision in advance can reduce the temptation to sacrifice sleep before deadlines.

    You do not have to adopt every habit at once. Start with one or two changes and build a routine that you can maintain.

    10. How to Balance Studying and Sleep Before Exams

    Examination periods can make it especially difficult to protect your sleep. You may have several tests in one week, assignments to submit, and topics that still need revision.

    The solution is to plan around both learning and recovery.

    Start by listing your exam dates and identifying the subjects that need the most attention. Break large topics into smaller sections and schedule revision across the available days.

    Use active recall, practice tests, and spaced review to make your study sessions more focused. Take short breaks when your concentration drops, and set a reasonable stopping time for the evening.

    If you are behind schedule, identify the most important material rather than trying to cover every detail perfectly. Where possible, ask your teacher or lecturer which topics and learning objectives deserve particular attention.

    Most importantly, avoid treating sleep as a reward you receive only after all the work is finished. Academic work can expand to fill every available hour, so sleep needs to be part of the plan from the beginning.

    Frequently Asked Questions

    Does sleep help students remember what they study?

    Yes. Sleep supports memory consolidation, a set of processes through which the brain strengthens and organizes some of the information learned during the day. Getting adequate sleep both before and after learning can support memory and attention.

    Is six hours of sleep enough for a student?

    It depends on age and individual needs, but six hours is below general recommendations for most teenagers and adults. Teenagers aged 13–17 are generally advised to get 8–10 hours, while adults aged 18–60 should usually get at least seven hours per night.

    Is it better to study or sleep before an exam?

    If you have to choose between an all-night revision session and getting adequate sleep, protecting your sleep is generally the wiser choice. Use the time available for focused revision, review key concepts, and avoid sacrificing the entire night to study.

    Can poor sleep affect academic performance?

    Yes. Insufficient sleep can interfere with attention, learning, memory, mood, and decision-making. These functions are important for completing assignments, following lessons, and answering exam questions effectively.

    How can students improve sleep during exams?

    Create a revision schedule in advance, maintain a regular sleep routine, limit late-day caffeine, reduce screen use before bed, and avoid all-nighters. Breaking revision into smaller sessions can help you prepare without repeatedly sacrificing rest.

    What should I do if I cannot sleep even when I have enough time?

    Try maintaining consistent sleep and wake times, creating a relaxing bedtime routine, and reducing caffeine late in the day. If sleep problems continue or affect your daily functioning, speak with a healthcare professional to discuss possible causes and suitable support.

    Final Thoughts

    Understanding the importance of sleep for students can change how you approach academic work. Sleep supports memory, concentration, learning, problem-solving, and emotional well-being—all of which contribute to your ability to study effectively.

    Instead of trying to gain more study hours by staying awake all night, build a routine that combines focused revision with adequate rest. Keep a consistent sleep schedule, plan ahead for examinations, and make changes when your workload becomes difficult to manage.

    You do not need a perfect routine every night. The goal is to develop habits that support both your education and your health over time.

    Good studying is not only about how much time you spend with your books. It is also about giving your brain the conditions it needs to learn, remember, and think clearly.

  • How to Recover From Academic Burnout as a Student

    How to Recover From Academic Burnout as a Student

    Academic life can be rewarding, but constant assignments, exams, deadlines, and pressure to succeed can eventually become overwhelming. You may find yourself studying for hours without absorbing information, avoiding tasks you once handled easily, or feeling exhausted even after taking a break. If this sounds familiar, you may be experiencing academic burnout.

    Learning how to recover from academic burnout starts with understanding that exhaustion is not a sign of laziness or a lack of ability. It may be a signal that your current workload, expectations, and recovery habits are no longer working well together.

    The solution is not always to study harder or force yourself to become productive overnight. Instead, recovery involves reducing unnecessary pressure, rebuilding healthy routines, adjusting your study habits, and seeking support when needed.

    In this guide, you will learn how to recognize academic burnout, take practical steps toward recovery, regain motivation gradually, and reduce the risk of becoming overwhelmed again.

    What Is Academic Burnout?

    Academic burnout is a pattern of exhaustion and disengagement associated with prolonged academic stress. Students experiencing burnout may feel mentally drained, disconnected from their studies, or less confident in their ability to complete academic tasks.

    It can affect high school students, university students, postgraduate learners, and people balancing education with work or family responsibilities.

    Academic burnout is different from simply feeling tired after a difficult week. Temporary stress may improve after an exam or deadline passes. Burnout-like symptoms may persist and interfere with your ability to study, rest, and manage everyday responsibilities.

    Common signs of academic burnout include:

    • Persistent exhaustion: You feel drained even after ordinary rest.
    • Loss of motivation: Starting assignments or attending classes feels unusually difficult.
    • Difficulty concentrating: You struggle to understand readings, remember information, or complete familiar tasks.
    • Emotional detachment: Subjects that once interested you now seem meaningless or frustrating.
    • Increased procrastination: You delay tasks because they feel overwhelming.
    • Negative self-talk: You frequently feel that you are falling behind or are not capable enough.
    • Changes in daily habits: Your sleep, eating patterns, social activities, or personal routines become disrupted.

    These signs do not automatically confirm burnout. Anxiety, depression, physical health problems, sleep difficulties, and other challenges can produce similar symptoms. If the changes persist or significantly affect daily life, consider speaking with a qualified professional.

    What Causes Academic Burnout?

    Academic burnout rarely develops from a single difficult assignment. It often builds when demands remain high while opportunities to rest and recover become limited.

    Several factors may contribute to this pattern.

    1. An Unmanageable Workload

    Taking multiple demanding courses, preparing for exams, completing group projects, and meeting overlapping deadlines can leave little time for recovery.

    2. Perfectionism and Fear of Failure

    Some students believe every assignment must be perfect or that anything less than a top grade represents failure. These expectations can make even manageable tasks feel exhausting.

    3. Poor Work-Life Balance

    When study occupies nearly every available hour, students may lose time for sleep, exercise, friendships, hobbies, and other activities that help them recharge.

    4. Constant Comparison With Others

    Comparing your grades, productivity, or achievements with classmates and people on social media can create pressure to do more, even when your current workload is already too demanding.

    5. Ineffective Study Habits

    Last-minute cramming, frequent distractions, unrealistic schedules, and long study sessions without breaks may make academic work more tiring and less effective.

    Understanding your own triggers helps you choose the right recovery steps rather than treating every problem as a lack of discipline.

    1. Accept That You Need Recovery, Not More Pressure

    One of the first steps in learning how to recover from academic burnout is to stop treating exhaustion as a personal failure.

    You might feel guilty about taking breaks because other students appear to be studying constantly. However, pushing yourself harder when you are already overwhelmed may make it more difficult to address the underlying problem.

    Start by acknowledging what you are experiencing. You do not need to label yourself or make a medical diagnosis to recognize that your current routine is not sustainable.

    Ask yourself:

    • Have I been feeling exhausted for several weeks?
    • Do I struggle to start tasks that used to feel manageable?
    • Am I sacrificing sleep or meals to keep up with assignments?
    • Have I lost interest in activities outside my studies?
    • Does my current schedule leave enough time for recovery?

    Your answers can help you identify where your routine needs to change.

    Remember: Recovery is not giving up on your education. It is making adjustments so you can continue in a healthier and more sustainable way.

    2. Reduce Your Immediate Academic Pressure

    When everything feels urgent, trying to complete every task at once can increase stress. Instead, take a short period to review your responsibilities and decide what genuinely requires your attention first.

    Write down your current obligations, including assignments, exams, readings, presentations, and personal commitments.

    Then divide them into three categories:

    • Urgent and essential: Tasks with near deadlines or significant consequences.
    • Important but adjustable: Tasks that can be rescheduled, simplified, or discussed with an instructor.
    • Optional or lower priority: Activities that can temporarily be reduced or postponed.

    Choose one realistic next step rather than trying to solve your entire semester in a day.

    If you cannot meet a deadline, contact your instructor or academic adviser as early as possible. Explain the situation briefly and ask whether an extension, revised plan, or other option is available. Do not assume an adjustment will automatically be approved.

    If you are considering dropping a course or reducing your course load, speak with an academic adviser first. Changes may affect tuition, financial aid, graduation plans, accommodation arrangements, or visa conditions, depending on your circumstances.

    3. Prioritize Sleep and Basic Physical Needs

    When academic pressure increases, sleep and meals are often the first things students sacrifice. Unfortunately, neglecting these needs can make concentration, emotional regulation, and everyday tasks more difficult.

    Start rebuilding your routine with a few basic habits:

    • Maintain a reasonably consistent sleep and wake schedule.
    • Allow enough time for sleep according to your age and individual needs.
    • Eat regular meals and drink enough water.
    • Include gentle physical activity, such as walking or stretching, if it is suitable for you.
    • Take short breaks away from your study materials.
    • Make time for relaxing activities that do not involve academic performance.

    You do not need to transform every habit immediately. Choose one or two changes that feel manageable and build from there.

    For example, you might begin by setting a consistent bedtime and eating lunch away from your desk. Once those habits become easier, introduce another small change.

    If you remain unusually exhausted despite adequate rest, consider consulting a healthcare professional rather than assuming the problem is only academic stress.

    4. Take Meaningful Breaks Without Feeling Guilty

    Some students take breaks physically but continue worrying about unfinished assignments throughout the entire break. This can make it difficult to feel refreshed.

    A meaningful break involves stepping away from academic demands for a while.

    Depending on what helps you relax, you might:

    • Take a walk outdoors.
    • Listen to music.
    • Prepare a meal.
    • Talk with a friend.
    • Spend time on a hobby.
    • Stretch or practise gentle breathing.
    • Enjoy a short period without screens.

    Schedule breaks deliberately instead of waiting until you are completely exhausted. You can also protect a portion of each day for activities unrelated to school.

    If you feel guilty when resting, remind yourself that your day does not need to be productive every minute to be valuable.

    The purpose of a break is not to earn permission to work harder afterward. It is to give yourself time away from constant demands.

    5. Rebuild Your Study Routine Gradually

    After a period of burnout, returning immediately to a full study schedule may feel overwhelming. A gradual approach can make restarting easier.

    Begin by identifying the smallest useful task you can complete. This might be reading two pages, organizing your lecture notes, reviewing a few flashcards, or writing a rough assignment outline.

    Use a simple routine:

    1. Choose one specific academic task.
    2. Decide how much time you can realistically give it.
    3. Remove obvious distractions.
    4. Work for a manageable period.
    5. Take a break and reassess your energy.

    You might start with a 15- or 20-minute study session and gradually increase it when you feel ready. These time periods are examples, not rules. Adjust them to your concentration and current needs.

    Avoid measuring recovery only by the number of hours you study. Completing one important task calmly may be more useful than spending an entire afternoon feeling overwhelmed and making little progress.

    6. Set Realistic Goals Instead of Chasing Perfection

    Unrealistic expectations can keep students trapped in a cycle of overwork and disappointment.

    For example, planning to finish five chapters, write an entire essay, and revise three subjects in one evening may create pressure before you even begin.

    Instead, set goals that reflect your available time and energy.

    Try the following approach:

    Make the task specific. Replace “study chemistry” with “review chemical bonding and answer five practice questions.”

    Choose a realistic amount of work. Consider your deadlines, energy level, and other responsibilities.

    Define what completion means. Decide whether the goal is to understand a concept, finish a draft, or identify areas that need further review.

    Allow room for adjustments. If a task takes longer than expected, update the plan rather than treating the entire day as a failure.

    It can also help to distinguish between doing your best and demanding perfection. Not every assignment needs the same amount of time and attention. Prioritize according to learning objectives, deadlines, and the importance of each task.

    7. Stop Comparing Your Progress With Other Students

    Academic comparison can make burnout worse because you rarely see the full picture of another person’s life.

    A classmate may appear to manage multiple courses effortlessly, but you may not know about their support system, personal responsibilities, previous preparation, or private struggles.

    Social media can intensify this problem by showing achievements without showing the time, setbacks, or help behind them.

    Instead of asking whether you are doing as much as someone else, focus on your own needs and progress.

    You could track a few personal indicators each week:

    • Tasks completed or advanced.
    • Topics you understand better.
    • Sleep and rest habits.
    • Changes in stress or concentration.
    • Questions you need to ask a teacher.

    The purpose is to notice useful progress, not create another demanding performance target.

    Your academic journey does not have to look like anyone else’s to be worthwhile.

    8. Talk to Someone You Trust

    Burnout can make students feel isolated, particularly when they believe everyone else is coping successfully.

    Talking about your experience with someone you trust may help you feel less alone and identify practical options you have not considered.

    You could speak with a friend, family member, classmate, teacher, mentor, or academic adviser.

    If you need help with a specific problem, explain what is happening and what kind of support would be useful. For example, you might ask a classmate to study together, request clarification about an assignment, or ask an adviser to help you prioritize deadlines.

    If symptoms are persistent, severe, or interfering with everyday functioning, consider contacting a school counsellor, university counselling service, psychologist, or healthcare professional.

    Seek prompt professional support if you experience persistent hopelessness, significant changes in sleep or appetite, or difficulty managing ordinary responsibilities. If you feel at risk of harming yourself, contact local emergency services or a crisis support service in your area.

    You do not have to wait until you reach a breaking point before asking for help.

    9. Rediscover Motivation Through Small Wins

    When you are burned out, waiting to feel motivated before doing anything can leave you stuck. Motivation may return gradually as you regain stability and experience manageable progress.

    Choose tasks that are small enough to begin without excessive pressure.

    For example, organize one folder, review one concept, or draft the first paragraph of an assignment. Once you complete the task, acknowledge the progress instead of immediately adding several new demands.

    You can also reconnect with the reasons you chose your course or subject. Perhaps you enjoy solving problems, want to develop a professional skill, or are working toward a long-term personal goal.

    If your original goals no longer feel meaningful, give yourself permission to reflect. An academic adviser or career counsellor may help you explore your options without making a rushed decision during a stressful period.

    The goal is not to force yourself to love every subject again. It is to rebuild a manageable relationship with learning.

    10. Create a Sustainable Plan to Prevent Burnout From Returning

    Recovery becomes more sustainable when you address the patterns that contributed to your exhaustion.

    Once your routine begins to feel more manageable, create a weekly plan that includes both academic responsibilities and time for recovery.

    A sustainable plan should include:

    • Prioritized tasks: Identify the most important work for each week.
    • Study blocks: Schedule realistic periods for focused learning.
    • Recovery time: Protect breaks, sleep, meals, and personal activities.
    • Early communication: Ask for clarification or help before a problem becomes urgent.
    • Flexible expectations: Leave some room for unexpected assignments or personal responsibilities.
    • Regular check-ins: Notice changes in energy, mood, concentration, and motivation.

    Pay attention to warning signs such as repeatedly staying up late, missing meals, cancelling every social activity, or feeling anxious whenever you are not studying.

    When these patterns appear, review your schedule early. You may need to reduce commitments, change study methods, or seek additional support.

    A sustainable routine is not one that maximizes every hour. It is one you can maintain without continually sacrificing your well-being.

    Frequently Asked Questions About Academic Burnout

    How long does it take to recover from academic burnout?

    Recovery time varies from person to person. It depends on the duration and severity of the stress, the demands that remain, available support, and other personal circumstances. Some students notice improvements after making practical changes, while others need more time or professional help. Avoid setting a strict deadline for feeling better.

    Can you recover from academic burnout without taking a break from school?

    Some students can improve their situation by adjusting their schedules, reducing unnecessary commitments, improving rest, and seeking academic support. Others may need a lighter workload or a formal break. Discuss significant changes with an academic adviser so you understand the possible consequences before deciding.

    Is academic burnout the same as laziness?

    No. Feeling persistently exhausted, disengaged, or unable to start tasks is not the same as choosing not to make an effort. These experiences can have several causes, and self-criticism rarely provides a useful solution. Focus on identifying what is making academic work difficult and what support or adjustments may help.

    How do I study when I feel completely burned out?

    Start by checking whether you need rest or additional support rather than forcing a long study session. If you feel able to work, choose one small, clearly defined task and give yourself a realistic time limit. If concentration remains difficult, reduce the immediate workload where possible and seek guidance.

    What should I do if academic burnout affects my mental health?

    Talk with a qualified mental health professional or healthcare provider if symptoms persist, become severe, or interfere with daily functioning. A school or university counselling service may also help you explore coping strategies and academic adjustments. You do not need to manage everything alone.

    Final Thoughts

    Learning how to recover from academic burnout begins with recognizing that constant exhaustion is a reason to reassess your routine, not a reason to criticize yourself.

    Start by reducing unnecessary pressure, restoring basic habits, taking meaningful breaks, and returning to academic tasks gradually. Set realistic goals, communicate with instructors when you need help, and seek professional support if symptoms persist or significantly affect your life.

    Most importantly, do not measure your recovery only by how quickly you return to your previous workload. Focus on building a healthier and more sustainable approach to learning.

    Academic success matters, but so does your well-being. With practical adjustments, appropriate support, and patience, you can work toward a better balance between your education and your life outside the classroom.

  • How to Manage Exam Anxiety Before and During Tests

    How to Manage Exam Anxiety Before and During Tests

    Exam anxiety is a common challenge for students at school, college, and university. You may understand your lessons but still feel nervous when an exam approaches. Your heart may beat faster, your hands may become sweaty, or your mind may suddenly go blank when you read a question.

    The good news is that you can learn how to manage exam anxiety with practical preparation strategies, calming techniques, and a more balanced approach to academic performance. You do not need to eliminate every feeling of nervousness to perform well. The goal is to keep anxiety manageable so you can focus on what you have learned.

    In this guide, you will discover what causes exam anxiety, how to reduce stress before a test, what to do when you feel overwhelmed during an exam, and when to seek additional support.

    What Is Exam Anxiety?

    Exam anxiety is a feeling of worry, fear, or tension related to taking a test. Some nervousness before an important assessment is normal. However, intense anxiety can make it difficult to concentrate, remember information, understand questions, or manage time effectively.

    Exam anxiety can affect students who have prepared thoroughly as well as those who feel unprepared. It may be connected to fear of failure, pressure from family, perfectionism, previous disappointing results, or uncertainty about the exam format.

    Common signs include:

    • Physical symptoms: A racing heartbeat, sweating, trembling, stomach discomfort, or rapid breathing.
    • Emotional symptoms: Fear, irritability, helplessness, or feeling overwhelmed.
    • Thinking difficulties: Negative thoughts, poor concentration, self-doubt, or temporarily struggling to recall information.
    • Behavioural changes: Procrastination, excessive studying, avoiding practice tests, or repeatedly checking notes without a clear plan.

    Recognizing these signs is an important first step. Once you understand how anxiety affects you, you can choose strategies that address your specific challenges.

    1. Start Preparing for Exams Early

    One of the most practical ways to reduce exam anxiety is to begin studying before the last minute. Leaving too much material until the night before a test can increase pressure and make it harder to feel prepared.

    Create a study schedule as soon as you know your exam dates. Divide each subject into manageable topics and assign realistic study sessions throughout the week.

    For example, instead of planning to revise an entire biology course in one evening, schedule separate sessions for cell structure, genetics, human physiology, and practice questions.

    Use these steps to build a realistic study plan:

    1. List your upcoming exams and their dates.
    2. Identify the topics covered in each assessment.
    3. Break large topics into smaller tasks.
    4. Schedule regular review sessions and short breaks.
    5. Leave time for practice questions and difficult subjects.

    A manageable plan gives you a clearer picture of your progress. If you fall behind, adjust your schedule rather than assuming you have failed.

    2. Use Active Study Techniques

    Reading the same notes repeatedly may feel productive, but it does not always show whether you can recall or apply the information independently.

    Try active recall by closing your notes and answering questions from memory. Use flashcards, explain a concept in your own words, or solve practice problems without looking at worked examples.

    Spaced practice is also useful. Instead of reviewing a topic only once, return to it over several days. This allows you to identify gaps in your knowledge before the exam.

    Consider using the following routine:

    • Review a topic for 25–40 minutes.
    • Test yourself without looking at your notes.
    • Check your answers and identify mistakes.
    • Revisit difficult points during a later session.

    Adjust the length of each session to your concentration and workload. The purpose is not to study for a fixed number of hours but to build reliable knowledge and confidence.

    3. Practise With Realistic Mock Tests

    Uncertainty about an exam can make it feel more intimidating. Practice tests help you become familiar with question styles, time limits, and the process of working under pressure.

    Whenever possible, use past papers, instructor-provided sample questions, quizzes, or practice exercises that match your course.

    To make practice more useful, try to:

    • Set a time limit similar to the real assessment.
    • Work without unnecessary interruptions.
    • Follow the exam instructions.
    • Review both correct and incorrect answers.
    • Note which topics need further study.

    Do not treat a low practice score as proof that you will fail. Use it as feedback. If you repeatedly struggle with the same type of question, ask your teacher or tutor for clarification and practise that skill again.

    Regular practice can also help you develop a routine that feels familiar on exam day.

    4. Challenge Negative Thoughts

    Exam anxiety often becomes stronger when students interpret a test as a judgment of their intelligence or future.

    Thoughts such as “If I fail, my future is over” or “I must answer every question perfectly” can create unnecessary pressure. These statements are predictions, not established facts.

    When you notice negative thinking, pause and replace it with a more realistic statement.

    For example:

    • Instead of “I will forget everything,” try “I may feel nervous, but I can work through the questions one at a time.”
    • Instead of “One poor result means I am not intelligent,” try “A result shows how I performed on this assessment, and I can learn from it.”
    • Instead of “I must know everything,” try “I will focus on the material I have prepared and do my best.”

    You do not need to force yourself to feel completely confident. Balanced self-talk helps you respond to uncertainty without allowing it to control your actions.

    5. Learn a Simple Breathing Technique

    Slow, comfortable breathing can help you manage physical tension when anxiety rises. Practise this technique before exam day so it feels familiar when you need it.

    Follow these steps:

    1. Sit comfortably and relax your shoulders.
    2. Breathe in gently through your nose.
    3. Breathe out slowly without forcing the air.
    4. Continue for several comfortable breaths.
    5. Bring your attention back to the present task.

    Try breathing in for about four seconds and out for about six seconds if that feels comfortable. You can shorten the count if needed. Stop or return to normal breathing if you feel dizzy or uncomfortable.

    The aim is not to make every anxious feeling disappear. It is to give yourself a brief pause so you can redirect your attention to the exam.

    6. Protect Your Sleep Before the Exam

    Staying awake all night to study may seem like a way to gain extra preparation time, but sleep loss can affect attention, learning, and memory.

    Try to maintain a consistent sleep schedule in the days before your assessment. Prepare your materials earlier in the evening, finish intense revision at a reasonable time, and allow yourself enough opportunity to rest.

    If you are a teenager, your sleep needs may differ from those of an adult. Choose a sleep routine appropriate for your age and individual needs.

    Avoid making the final night a marathon study session. If you need to review, focus on key concepts, summaries, or a few practice questions rather than attempting to relearn the entire course.

    A rested mind may find it easier to concentrate and respond calmly when the exam begins.

    7. Eat Regularly and Be Careful With Caffeine

    Physical discomfort can make exam stress harder to manage. Try to eat regular, balanced meals and drink enough water in the days leading up to the test.

    On exam morning, choose a meal or snack that suits your appetite and routine. If you normally eat breakfast, avoid skipping it simply because you feel nervous.

    Pay attention to caffeine as well. Coffee, energy drinks, and other caffeinated products can increase jitteriness or a racing heartbeat in some people. Avoid experimenting with unusually large amounts before an important assessment.

    You do not need a special diet to manage exam anxiety. Consistent habits, hydration, and suitable meals are more practical than last-minute changes.

    8. Create a Calm Exam-Day Routine

    A predictable routine can reduce the number of decisions you need to make when you are already feeling nervous.

    The evening before your exam, prepare your permitted stationery, identification, calculator, or other required materials. Check the location, start time, travel arrangements, and exam rules.

    On the day of the test:

    • Wake up with enough time to get ready without rushing.
    • Eat and drink according to your usual routine.
    • Review only essential notes if that helps you feel prepared.
    • Arrive early enough to settle in.
    • Avoid stressful conversations about how much everyone else has studied.
    • Take a few slow breaths before the assessment begins.

    Try not to compare your preparation with other students. Someone else’s confidence or study schedule does not tell you how well you will perform.

    9. Focus on One Question at a Time During the Exam

    When you sit down to take the test, you may begin worrying about your final grade, the amount of time remaining, or what will happen if you cannot answer a question.

    These concerns can pull your attention away from the task in front of you. Instead, break the exam into smaller steps.

    First, read the instructions carefully. Check the structure of the paper and the marks allocated to each section. If the format allows, answer questions you understand well before returning to more difficult ones.

    Use these strategies to stay focused:

    Read the question carefully. Identify the command word, such as explain, compare, calculate, or evaluate. Make sure you understand what the examiner wants.

    Plan your time. Allocate time according to the marks and difficulty of each section. Keep some time for checking if possible.

    Break down difficult questions. Identify smaller parts that you can answer instead of treating the whole question as impossible.

    Move on when necessary. If you become stuck, mark the question and return to it later, provided the exam rules allow this.

    Avoid watching other students. Their speed does not determine your performance. Focus on your own paper.

    These techniques give you a practical structure to follow, even when you feel nervous.

    10. What to Do When Your Mind Goes Blank

    Temporarily forgetting information can feel frightening, especially when you studied the material beforehand. However, struggling to recall one answer does not mean you have forgotten everything.

    If your mind goes blank, stop writing for a moment if the rules permit. Place both feet comfortably on the floor, relax your shoulders, and take a few gentle breaths.

    Then try this reset:

    1. Read the question again slowly.
    2. Identify a word, formula, or concept connected to the topic.
    3. Write down any relevant points you can remember.
    4. Start with the easiest part of the question.
    5. Return to the question later if you still cannot progress.

    Avoid repeatedly telling yourself that you are failing. That thought can make it harder to focus on retrieving information.

    If you are taking an essay exam, a brief outline may help you organize what you remember. For a calculation, write down the relevant formula or known values if appropriate.

    11. Learn From Each Exam Without Judging Yourself

    Managing exam anxiety does not end when you hand in your paper. How you respond afterward can influence your confidence before the next assessment.

    Give yourself time to relax instead of immediately replaying every answer in your mind. You may not know exactly how you performed until the results are released.

    When you receive your marked paper, review it constructively. Ask yourself:

    • Which topics did I understand well?
    • Which mistakes could I have prevented?
    • Did I misread questions or run out of time?
    • Would more practice, a different study method, or additional help make a difference?

    Use the answers to adjust your next study plan. Avoid defining yourself by one grade or comparing your result with everyone else’s.

    Progress comes from identifying what you can change and applying those lessons to future assessments.

    12. Know When to Seek Support

    Occasional nervousness is a normal response to an important test. However, if anxiety regularly causes panic, disrupts sleep, prevents you from attending exams, or significantly affects your daily life, consider seeking support.

    You can speak with a teacher, academic adviser, school counsellor, university counselling service, or qualified mental health professional. They may help you identify the causes of your anxiety and develop suitable coping strategies.

    Ask your educational institution whether it offers exam preparation workshops, study-skills support, counselling, or formal accommodations. Any accommodations depend on the institution’s policies and your individual circumstances.

    Seeking help is not a sign of weakness. It is a constructive way to address a problem that may be difficult to manage alone.

    Frequently Asked Questions About Exam Anxiety

    How can I calm exam anxiety quickly?

    Try a few gentle, slow breaths, relax your shoulders, and focus on one manageable task. During the exam, read the question carefully and start with the part you understand best. These techniques may help you regain focus, although they will not remove every feeling of anxiety.

    Why do I forget everything during exams?

    Stress can interfere with concentration and make recalling information more difficult. Insufficient preparation, sleep loss, and unfamiliar exam conditions may also contribute. Regular revision, practice tests, and a calming routine can help you prepare for these challenges.

    Should I study the night before an exam?

    A short review of important concepts can be useful, but trying to learn everything overnight may increase stress. Prioritize essential material, prepare your belongings, and leave enough time for sleep.

    Is some exam anxiety normal?

    Yes. A degree of nervousness is common before an important assessment and does not automatically mean something is wrong. The concern is when anxiety becomes intense enough to interfere with studying, concentration, or exam performance.

    How can I stop worrying about failing an exam?

    Focus on what you can control, including preparation, practice, sleep, and your approach to questions. Replace catastrophic predictions with realistic thoughts and remember that one assessment does not define your worth or determine your entire future.

    Final Thoughts

    Learning how to manage exam anxiety takes practice, patience, and realistic expectations. Start preparing early, use active study methods, protect your sleep, and practise calming techniques before exam day. During the test, focus on the question in front of you, manage your time, and return to difficult questions when appropriate.

    You do not have to feel perfectly calm to do your best. The aim is to develop habits that help you respond to nervousness more effectively and show what you know.

    Every exam is also an opportunity to learn more about your preparation methods and identify what works for you. With consistent practice and the right support, you can approach future assessments with greater confidence and a clearer plan.